🚀 Exploring the Apollo Sandbox
So far, we've been using the Explorer page of Apollo Sandbox to build and test GraphQL queries. But Sandbox can do even more! Let's take a quick detour to explore some of the other tools in Sandbox.
First, we need to start our server. Open a terminal window, navigate to the server folder with cd server, then run npm start.
With the server running, we can go to the Sandbox in the browser by going to http://localhost:4000, then clicking Query your server to see our graph in action.
The Schema page
Let's check out the schema page (the first tab on the left sidebar).

This page gives us useful information about the current status of our schema. Because we're using Sandbox, Apollo Studio automatically polls our locally running server for schema changes.
The Schema page has two main tabs: Reference and SDL.
The SDL tab shows you your schema represented in schema definition language. It should look familiar from your own schema.js file!
The Reference tab shows you a high-level overview of your schema, including its defined types and fields. Notice the Play button to the right of the field? Click it and see what happens. It sends us directly to the Explorer, with the Documentation sidebar conveniently opened to the corresponding field!
🛠️ Building our query
Now that we're back in the Explorer page, let's get back to building our query. Clicking the plus button (⊕) on the track field, we start to see our query come together in the Operation panel.
First let's rename our query to better explain what it's for, so we'll replace Query
with GetTrack.
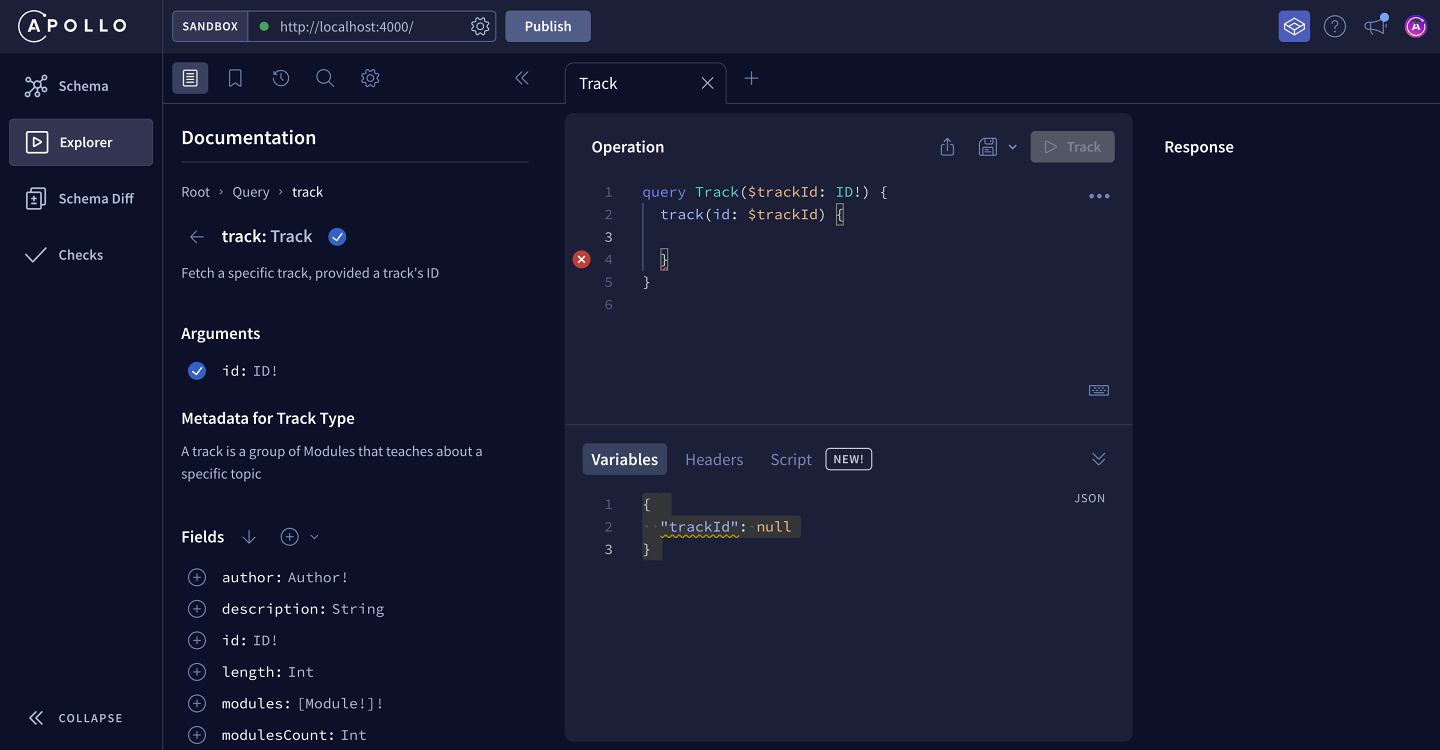
So far, the Operation panel of the Explorer should contain this:
query GetTrack($trackId: ID!) {track(id: $trackId) {}}
You'll notice something new here: a dollar sign ($) followed by the name trackId.
💰 Variables
The $ symbol indicates a variable in GraphQL. The name after the $ symbol is the name of our variable, which we can use throughout the query. After the colon is the variable's type, which must match the type of the argument we'll use it for.
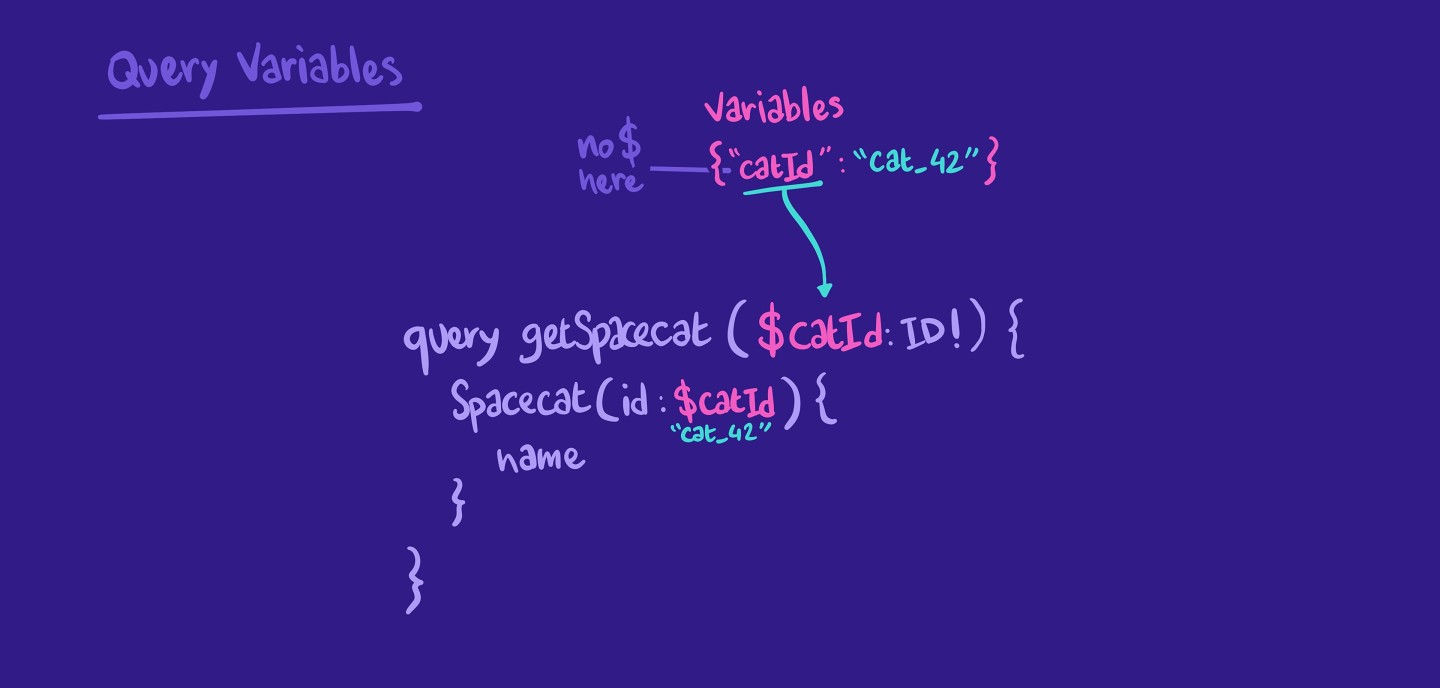
Variables are great—they let us pass argument values dynamically from the client-side so we don't have to hardcode values into our query. We'll use them every time we create a query with arguments.
Drag items from this box to the blanks above
$
graph
@
resolvers
name
arguments
schema
hardcoded
!
null
In our case, we have a variable called trackId that the Explorer set up for us down in the Variables section. Right now, it's set to null, but let's replace it with the track ID we've been testing so far: c_0.
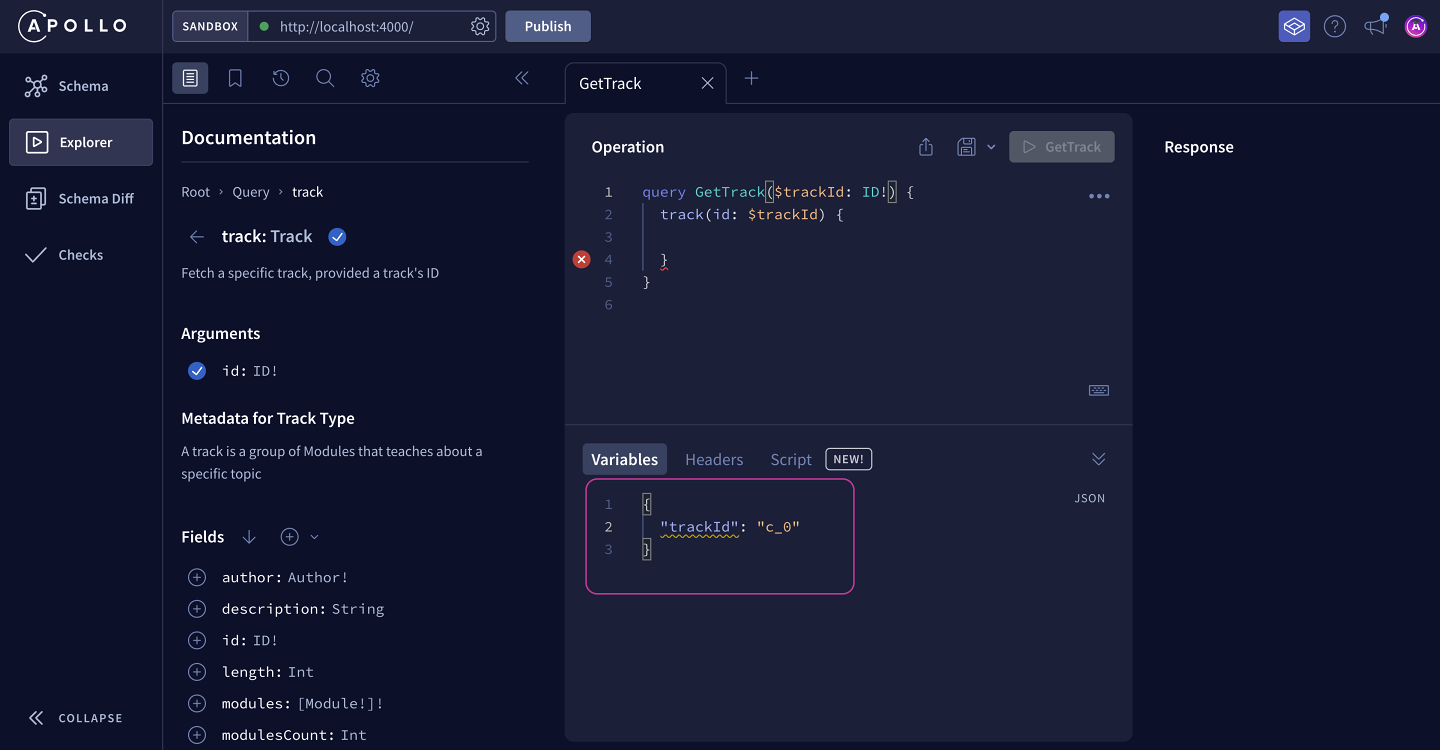
Add the following to the Variables section in the Explorer:
{ "trackId": "c_0" }
Before we start adding all the fields we need from our initial mockup, let's start small with just returning the id and the title.
The Operation panel of the Explorer should now look like this:
query GetTrack($trackId: ID!) {track(id: $trackId) {idtitle}}
When we click on the run query button, we see the data we're expecting! Awesome, let's add the rest of our fields by clicking the dropdown by the Fields subheading. When we click Select all fields recursively from the dropdown, we'll see all of our fields and subfields have been added to the query.
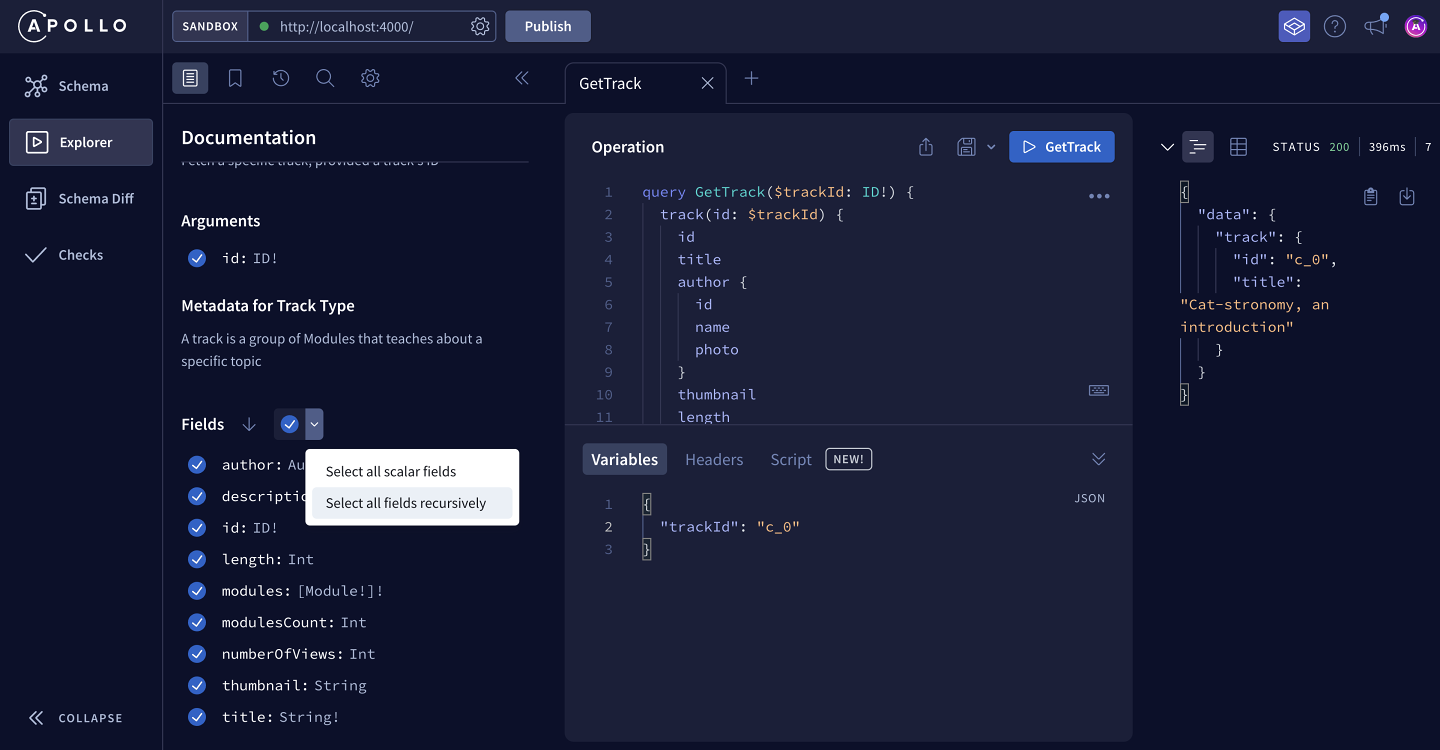
The full query should look like this:
query GetTrack($trackId: ID!) {track(id: $trackId) {idtitleauthor {idnamephoto}thumbnaillengthmodulesCountnumberOfViewsmodules {idtitlelength}description}}
Let's click on the Run Query button again… it looks like we get the complete track, but it's a bit tricky to read as a JSON object. The Explorer has a nice option to format the response as a table.
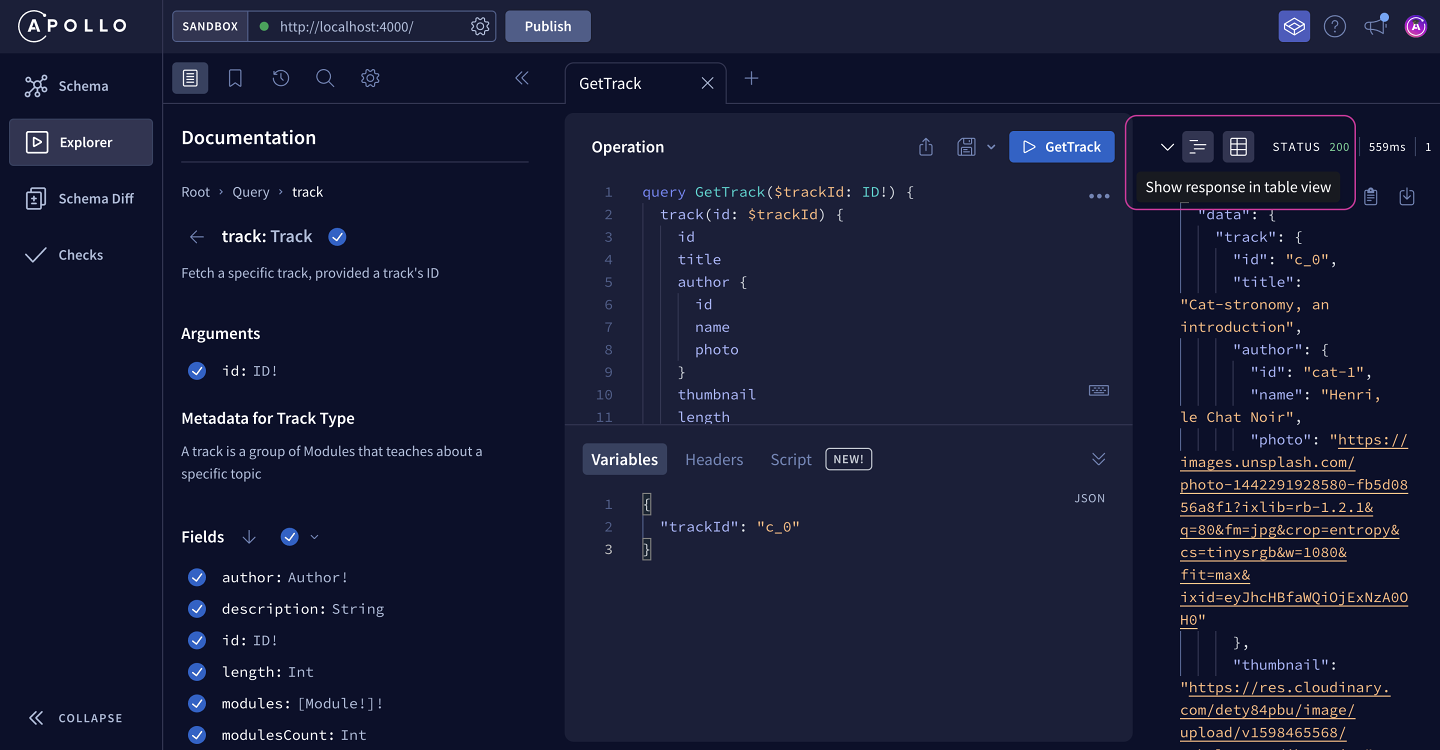
And now we can clearly see the track that we need, along with all the details for each module! Nice!

Build a query called getMission. This query uses a variable called isScheduled of type nullable Boolean. It retrieves a mission using the scheduled argument set to the isScheduled variable. It retrieves the mission's id and codename.
Our server is ready for our client's queries, so let's hop on over to client-land and work on the UI.
Share your questions and comments about this lesson
Your feedback helps us improve! If you're stuck or confused, let us know and we'll help you out. All comments are public and must follow the Apollo Code of Conduct. Note that comments that have been resolved or addressed may be removed.
You'll need a GitHub account to post below. Don't have one? Post in our Odyssey forum instead.