🧑🔬 Testing our mutation
Now that we have our schema, data source, and resolvers set up with helpful mutation responses, let's get ready to test our mutation in the Apollo Sandbox Explorer.
Let's start up the server by opening up a new terminal window. Here we'll navigate to the server folder with cd server, and run npm start.
With our server running, let's connect to our graph which is running on http://localhost:4000.
First let's check out our schema by clicking on the Schema page on the left sidebar. Under the Reference tab, we can see that there's a new Mutation type listed: the incrementTrackViews field!

To open the incrementTrackViews mutation in the Explorer, let's click on the play icon to the right of the field's description.
This takes us to the Explorer page, with the sidebar open and ready for us to start building our first mutation.
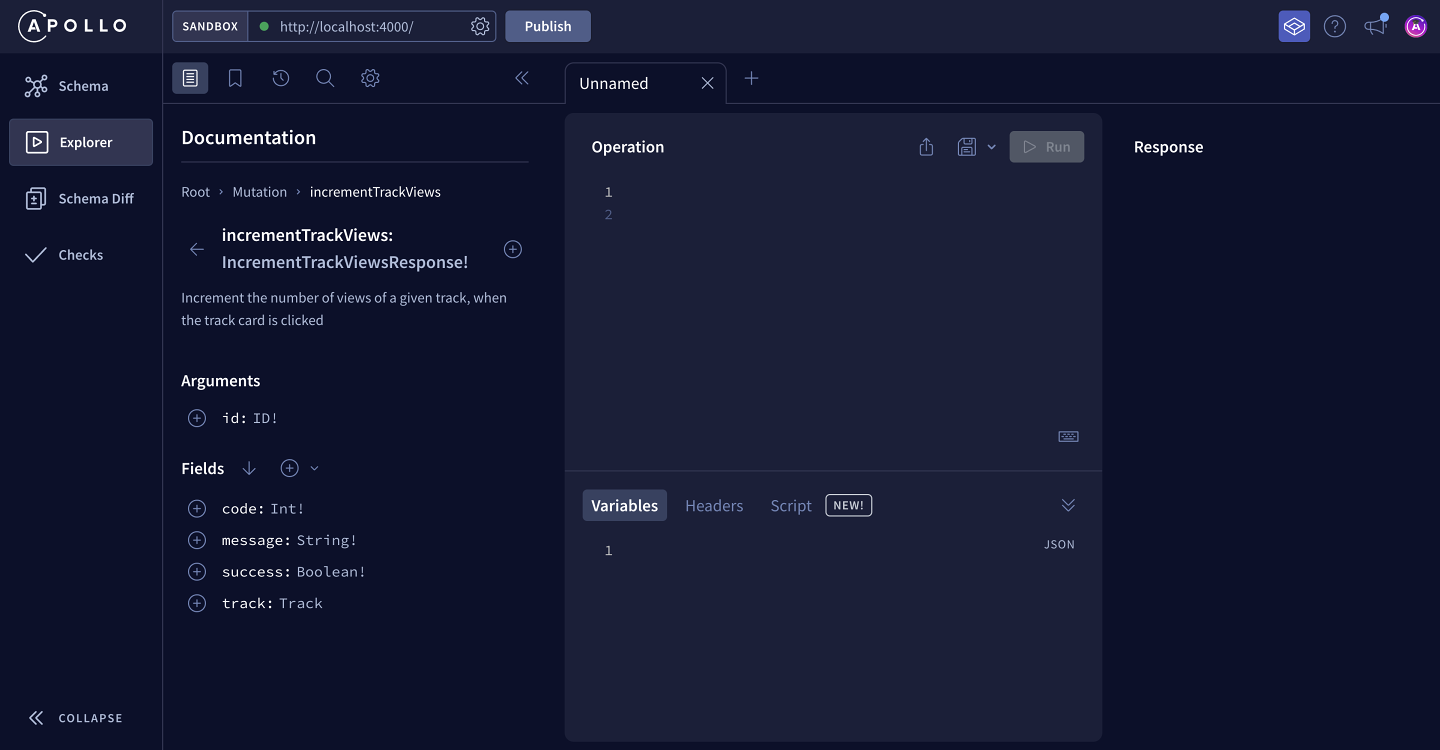
Click the plus button (⊕) beside incrementTrackViews to add it to our Operation panel. This pre-fills some information for us! The syntax should feel familiar because it's the same syntax we've seen so far with our queries, particularly in
Lift-off III where we used arguments and variables.
mutation IncrementTrackViews($incrementTrackViewsId: ID!) {incrementTrackViews(id: $incrementTrackViewsId) {}}
✍️ Building a GraphQL mutation
We start with the mutation keyword, and then the name of the operation (which the Explorer has named IncrementTrackViews for us). Inside the brackets, we've got a variable denoted by the $ symbol called incrementTrackViewsId, which is of type ID and required.
This variable is set in the Variables section below. Right now it's set to null, so let's change it to the same track ID we've been working with: c_0.
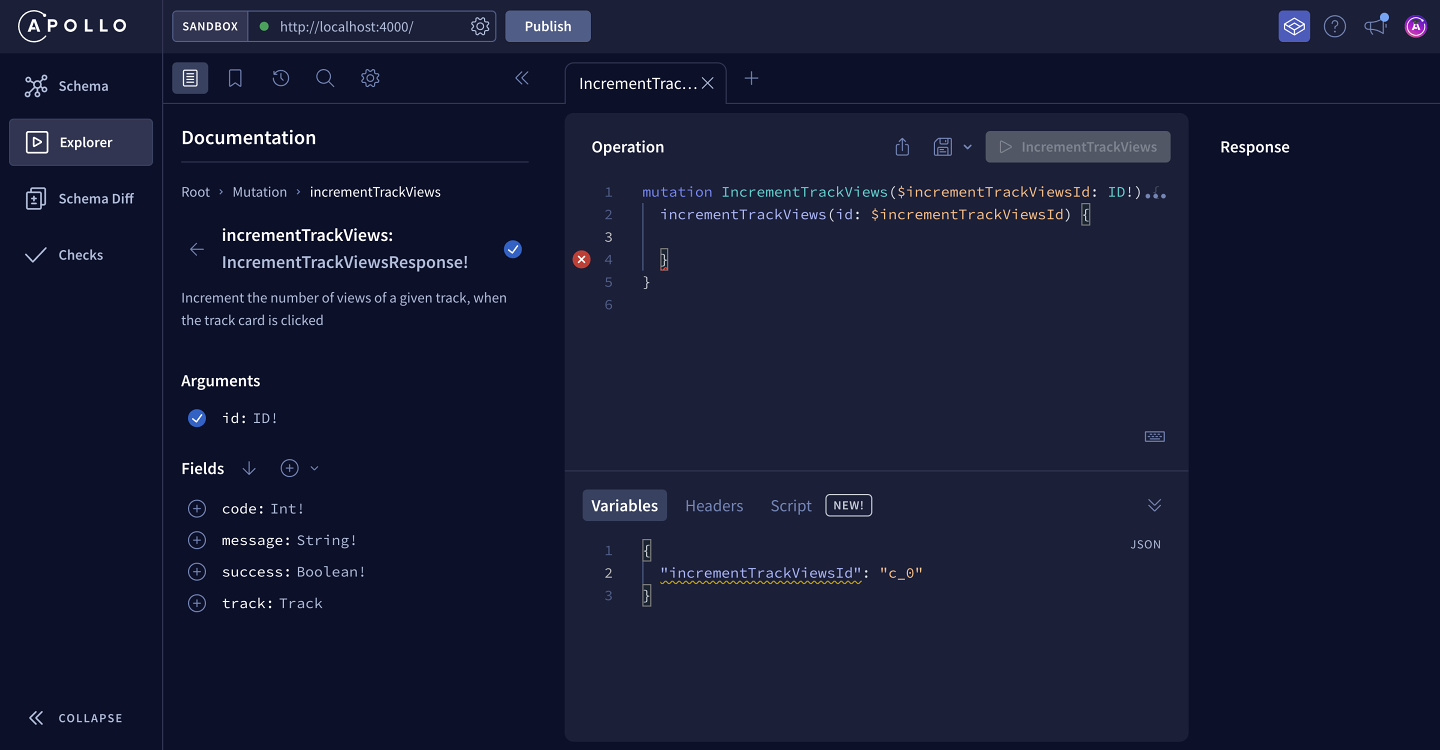
{"incrementTrackViewsId": "c_0"}
Back to the mutation in the Operation panel!
Inside the curly braces is where we list our mutation entry point: incrementTrackViews. It takes in an id argument, which we set to the variable incrementTrackViewsId, the same one we just set to c_0.
Now inside the second pair of curly braces we can start to add the fields available in our response object. These fields are in the sidebar, making it really easy to build this mutation by clicking on the plus button (⊕) button beside the field.
We want to see the code, the success boolean, the message, and the track object itself.
Inside the track object, we want the id and the numberOfViews. The number of views is what we're updating, so we want to see the newly updated value after the mutation is hopefully successful. The id will be used by our Apollo Client cache, which we'll cover a little later when we get to the frontend implementation.
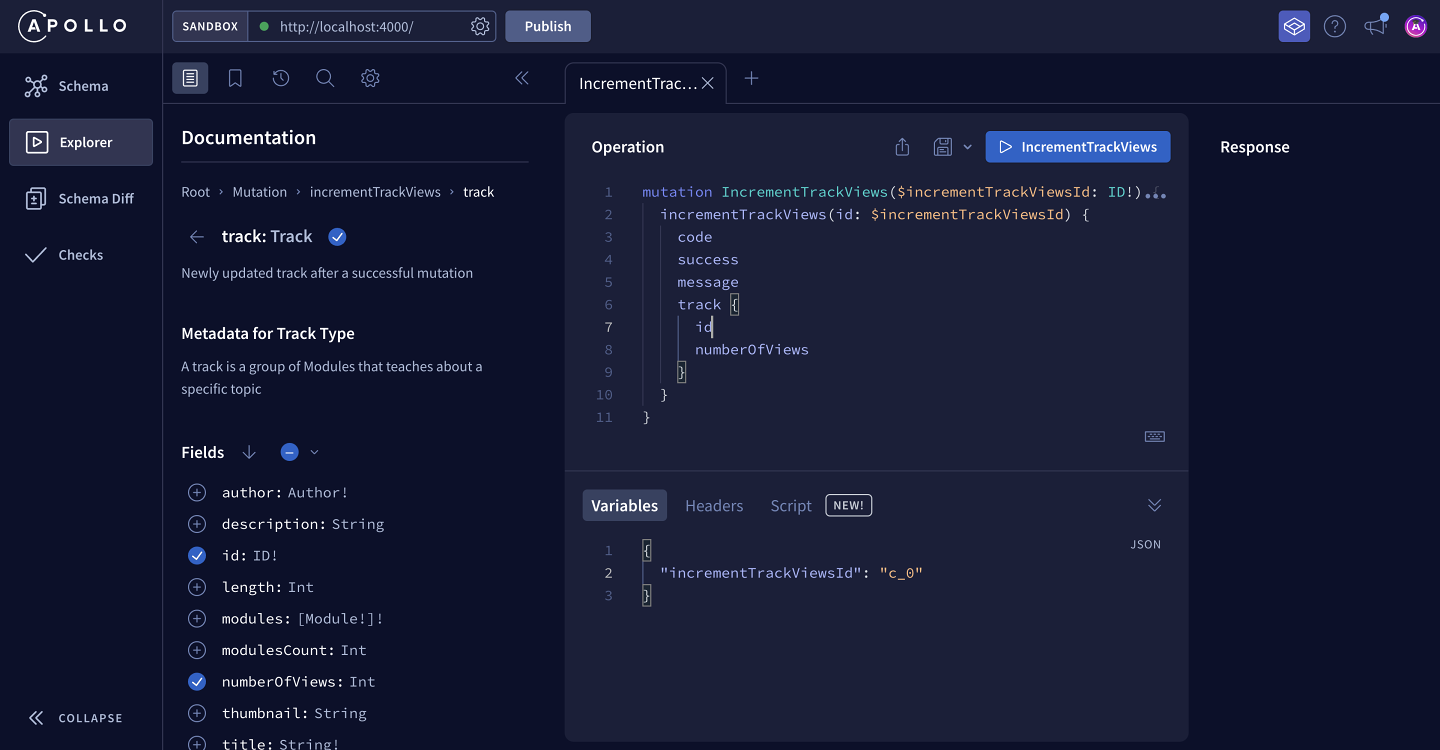
The mutation operation should look like this:
mutation IncrementTrackViews($incrementTrackViewsId: ID!) {incrementTrackViews(id: $incrementTrackViewsId) {codesuccessmessagetrack {idnumberOfViews}}}
Let's go ahead and run it!
On the right-hand side you can see the fields we expected: code is 200, the success flag is true, the message says it was successful and we get our newly updated track back.
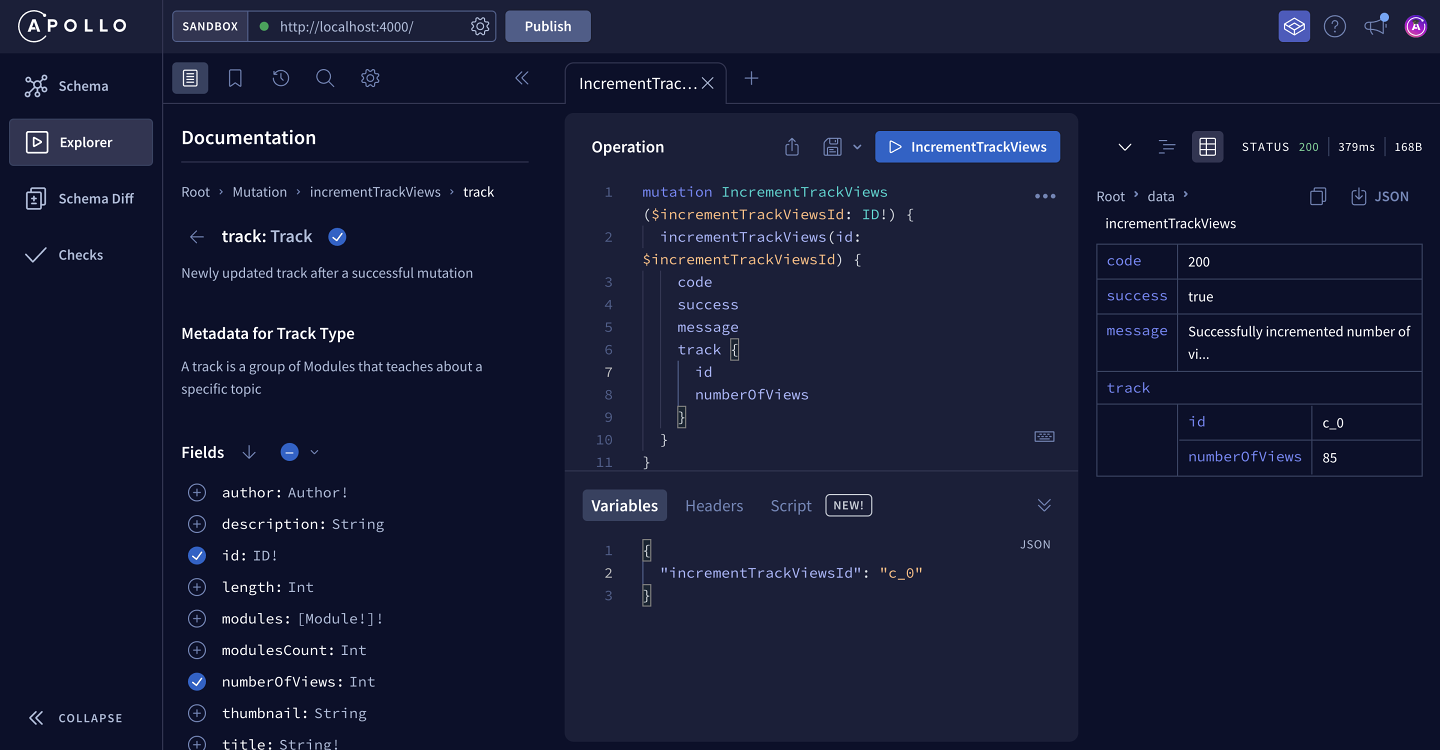
When we run the mutation again and again, we can see that the number of views is going up!
code, success and message coming from?Let's see what happens when we change the incrementTrackViewsId to our silly string "DOESNTEXIST".
{"incrementTrackViewsId": "DOESNTEXIST"}
When we run this mutation, we see the response has code 404, success is false, and the message says Could not find track with specified ID. The track is also set to null with no data available.
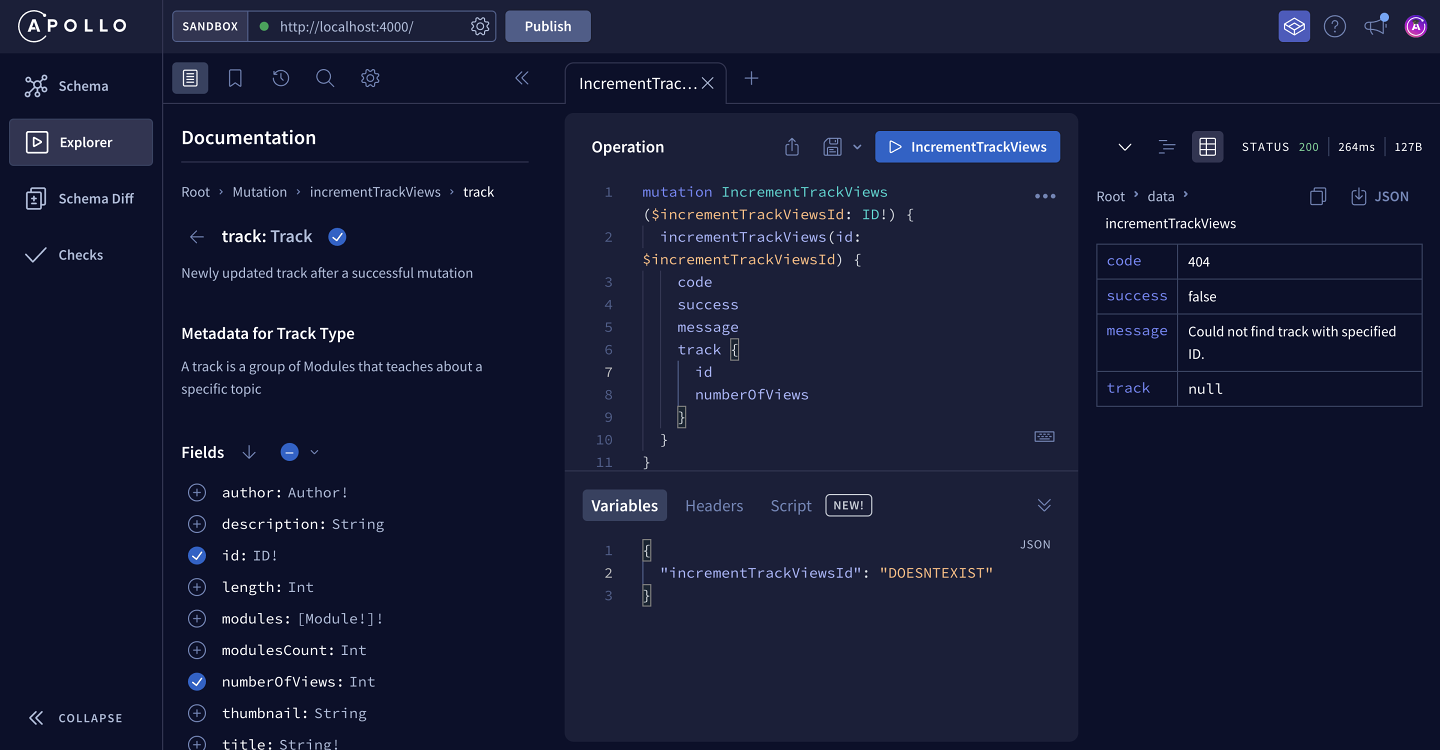
code and message coming from in the response?Our mutation looks great and it's doing what it's supposed to! It's time to jump over to client-land.
Share your questions and comments about this lesson
Your feedback helps us improve! If you're stuck or confused, let us know and we'll help you out. All comments are public and must follow the Apollo Code of Conduct. Note that comments that have been resolved or addressed may be removed.
You'll need a GitHub account to post below. Don't have one? Post in our Odyssey forum instead.