Overview
In this course, we'll dive into subscriptions and see how we can enable them as part of our federated graph.
We'll start by exploring how to define subscriptions in SDL (Schema Definition Language). We'll talk about the requirements for realtime data in GraphQL, along with the two subscription methods the router supports: WebSockets and HTTP callbacks. Then we'll dive deeper into callbacks, implementing real-time data capabilities in our graph. Finally, we'll take things even further with some cool optimizations and federated graph features.
Ready to jump in? Let's go!
What we're building
As we learn and practice these subscription concepts, we'll bring them into our course project: Airlock.
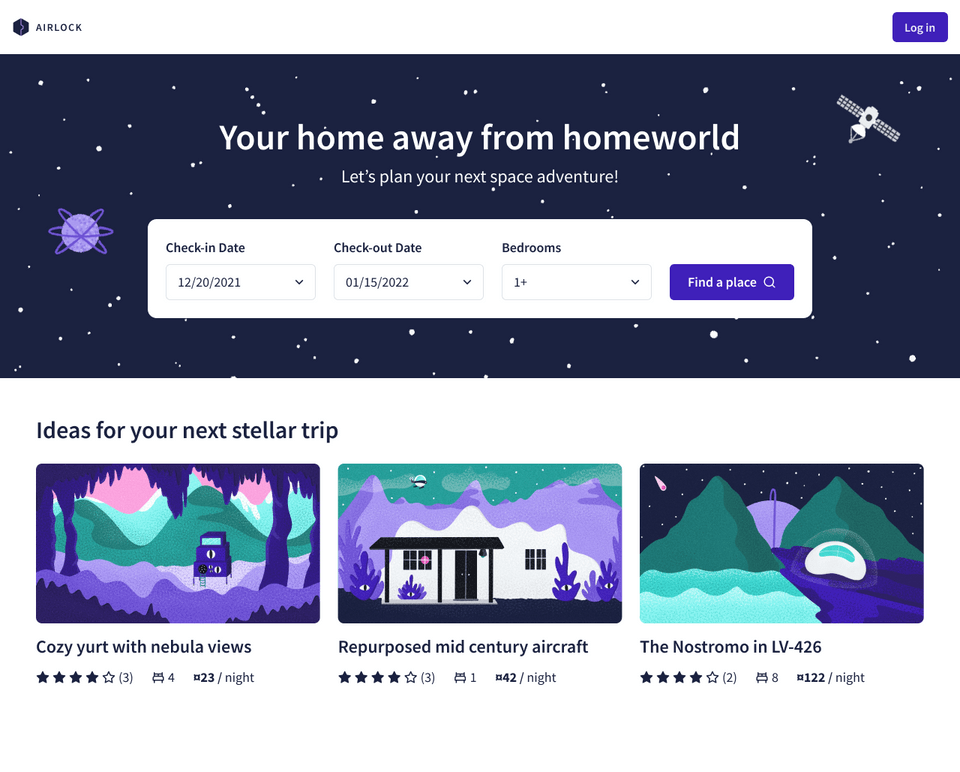
Airlock is an intergalactic trip booking app: a resource we can use to find a cool place to stay in the wide open universe.
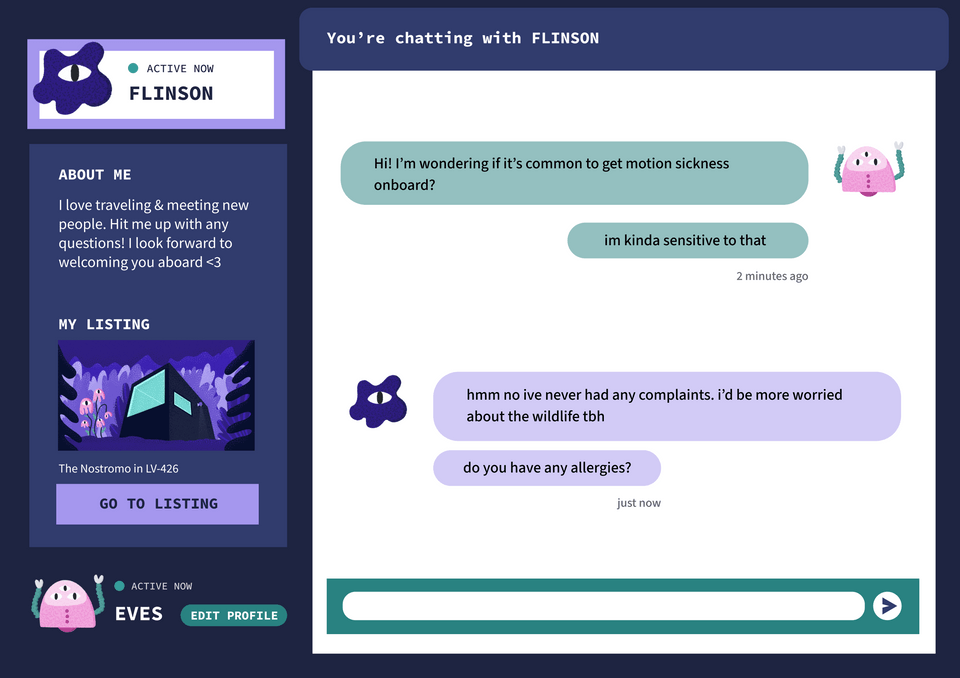
In this course, we'll equip our app with real-time data capabilities. First, we'll wire up a chat feature that uses federated subscriptions. Then, we'll power up our subscription operation with data from across our federated graph.
Let's get everything ready so we can start building.
Project setup
To follow along with the course, you will need the following:
Prerequisite knowledge
We assume that you are familiar with GraphQL concepts like types, queries, and mutations, as well as the basics of federation. Check out our other courses, Intro to GraphQL TypeScript and Federation with TypeScript & Apollo if you need a refresher.
You should also be familiar with TypeScript programming concepts.
Code editor or IDE
We're using VS Code.
Many popular IDEs offer plugins that enable GraphQL syntax highlighting. For VS Code, we recommend the GraphQL: Syntax Highlighting extension.
Clone the repository
Let's get our code set up. Run the command below to clone the project repository.
git clone https://github.com/apollographql-education/odyssey-federated-subscriptions.git
Running the project
Our project repository consists of three directories: accounts, messages, and router. We'll set up our router in an upcoming lesson, so for now we'll install dependencies and run the accounts and messages subgraphs.
In a terminal window, navigate to the accounts directory and run the following command to install dependencies:
npm install
And then the command to start up the subgraph server:
npm run dev
Then we'll open up a new terminal window and do the same for the messages subgraph! With both subgraphs running (accounts on port 4002, messages on 4001), we're good to go.
Rover setup
Rover is Apollo's command line interface (CLI) tool that helps developers work with graphs and interact with GraphOS. It's a handy and versatile tool that can be used for both local development and CI/CD.
In upcoming lessons, we'll use Rover to validate our local changes before we publish them.
Sign up for an Apollo GraphOS account with an Enterprise or GraphOS Trial plan
This course requires an Apollo account with an Enterprise or GraphOS Trial plan. You can still follow along if your organization is on a different plan, but you won't be able to complete certain hands-on tasks. You can also test out this functionality by signing up for a free trial.
Creating a supergraph
Finally, let's create a supergraph in GraphOS. We'll need these graph credentials to work with subscriptions in our local environment.
Open a new browser window and go to GraphOS Studio.
If you haven't created a graph in Studio before now, you'll be prompted to do so. Otherwise, we can create a new graph by clicking the + Create New Graph button in the upper right corner of the dashboard.
studio.apollographql.com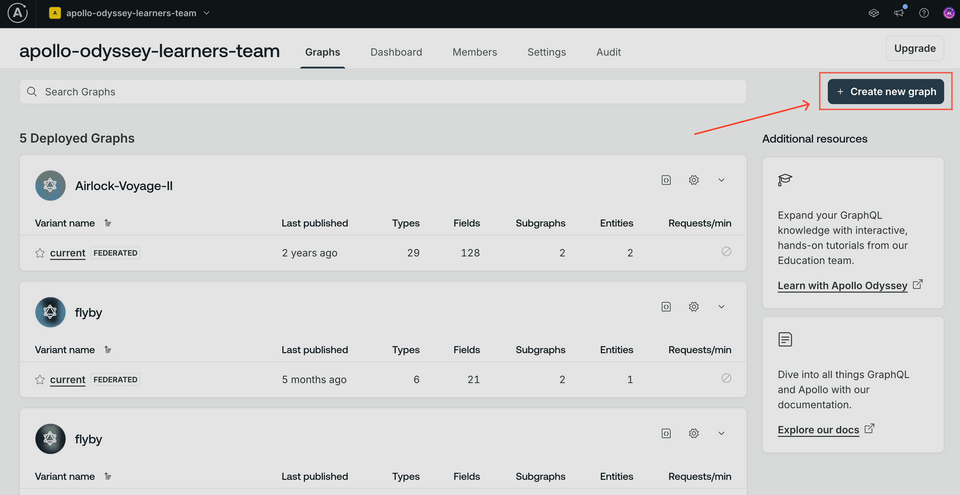
We'll give our graph a descriptive title, keep the default settings for Graph Architecture as "Supergraph", then click Next.
studio.apollographql.com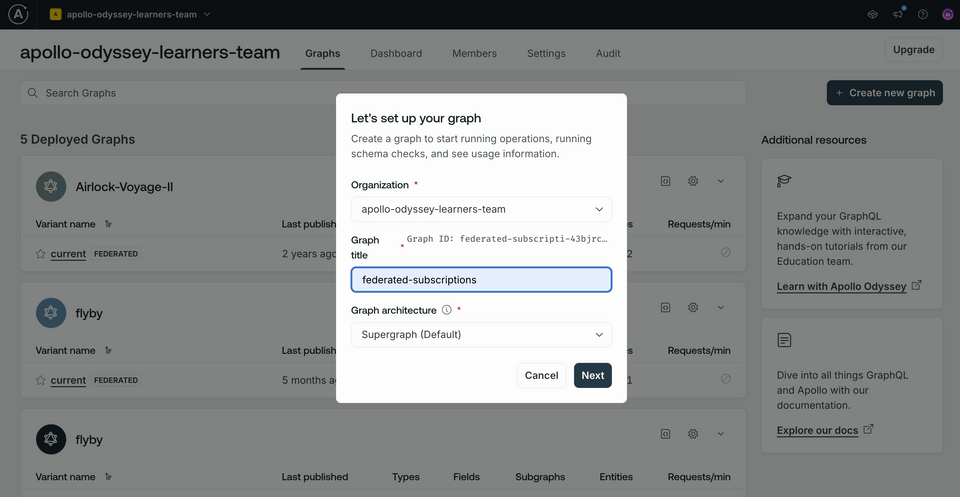
If you don't see the modal above, you may be on the wrong plan.
We should now see a modal with options for publishing a schema.
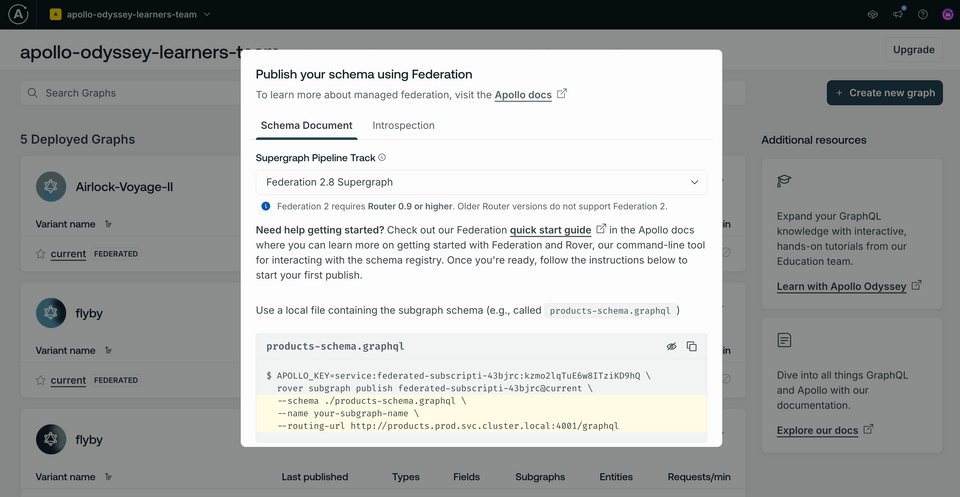
Saving our graph credentials
To run our supergraph locally, we'll need two values:
APOLLO_KEY: Your graph's API key, used to interact with a single graph in GraphOS. It starts with something likeservice:your-graph-name.APOLLO_GRAPH_REF: The graph reference (or graph ref) for our supergraph. A graph ref starts with the graph's ID, followed by an@symbol, followed by the graph variant.
We'll use these values every time we run the router, so we'll store them in our project's router directory, in a new file called .env. Let's add that now.
📦 router┣ 📄 router-config.yaml┣ 📄 supergraph.yaml┗ 📄 .env
Note: We've provided a couple of configuration files here in the router directory; they contain some boilerplate that we'll get to later in the course.
Next, we'll locate the values we need to save.
Go back to the configuration options in Studio that appeared after you created your supergraph. Make sure you're on the Schema Document tab.
First, make sure that the Supergraph Pipeline Track dropdown is set to Federation 2.8 Supergraph. This specifies that our supergraph should be built using the latest features of Apollo Federation.
studio.apollographql.com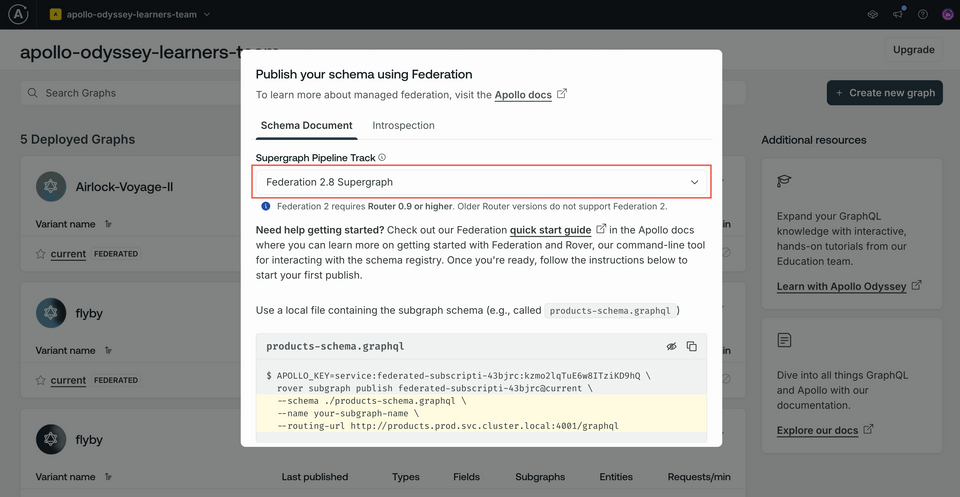
Below, take a little peek at the command for publishing a subgraph schema. This shows how we can use Rover to publish our subgraphs from the command line. We'll run this command for both subgraphs in just a moment, but for now let's just focus on the
APOLLO_KEYvalue included here.APOLLO_KEY=your-graphs-apollo-key \rover subgraph publish your-graph-name@current \--name products --schema ./products-schema.graphql \--routing-url http://products.prod.svc.cluster.local:4001/graphqlClick on the eye icon on the code block to reveal the full value of
APOLLO_KEY. CopyAPOLLO_KEYand its value into your project's.envfile. We'll need it for the next step, and won't have access to the same key again through Studio.studio.apollographql.com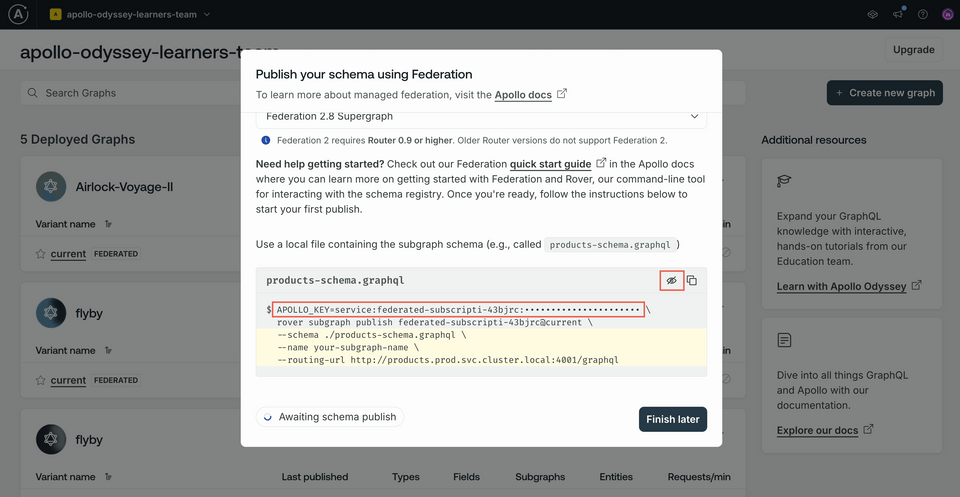 .envAPOLLO_KEY=your-unique-apollo-api-key
Now let's go back to Studio to get our graph ref. The value we're looking for appears in the same code block, directly after the
rover subgraph publishpart of the command. We'll save this value as an environment variable as well, but we can access it anytime from our graph's home page.studio.apollographql.com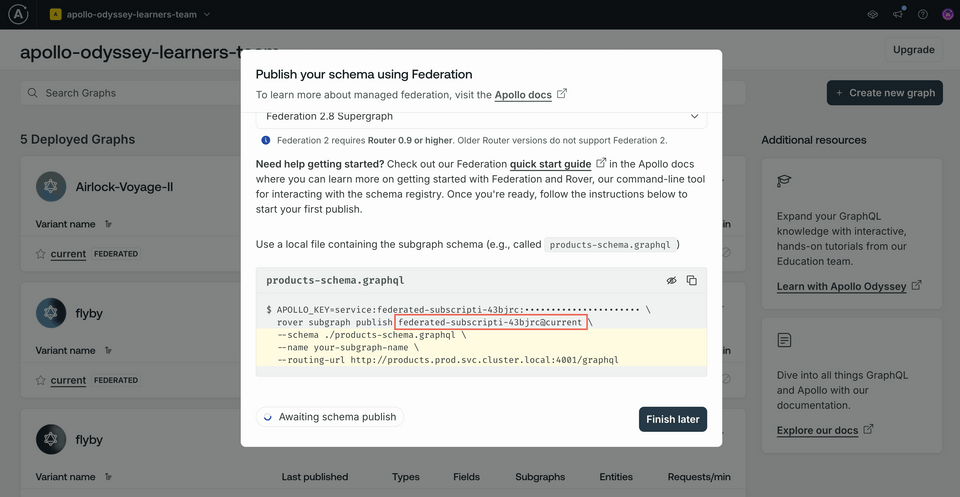 APOLLO_KEY=your-graphs-apollo-key \rover subgraph publish your-graph-name@current \--name products --schema ./products-schema.graphql \--routing-url http://products.prod.svc.cluster.local:4001/graphql
Great! Your .env file should now have both values for APOLLO_KEY and APOLLO_GRAPH_REF.
APOLLO_KEY=your-unique-apollo-api-keyAPOLLO_GRAPH_REF=your-graph-name@current
Publishing the subgraph schemas
Rover has a command ready to help us with this important task: rover subgraph publish. This command pushes the latest version of a single subgraph schema to Apollo Studio.
rover subgraph publish <APOLLO_GRAPH_REF> \--name <SUBGRAPH NAME> \--schema <SCHEMA FILE PATH> \--routing-url <ROUTING URL>
To use this command, we need the graph ref for the supergraph we want to publish to and the following command line options:
| Option | What is it? |
|---|---|
--name | What we want to call our subgraph in Apollo Studio |
--schema | The relative path to our subgraph's schema file |
--routing-url | The URL where our subgraph runs (locally, for now) |
Let's fill out this command for our accounts subgraph.
Note: If your accounts server is not already running, boot it up now with npm run dev!
Bounce back to the terminal and make sure we're in the
accountsdirectory of our project.Now let's type out the
rover subgraph publishcommand:Next, we'll paste in the value of our
APOLLO_GRAPH_REFenvironment variable.For the
nameoption, we'll pass inaccounts.For the
schemaoption, we'll pass in the path to our schema, which from the root of theaccountsdirectory is./src/schema.graphql.And for the
routing-urloption, we'll pass inhttp://localhost:4002.accountsrover subgraph publish <APOLLO_GRAPH_REF> \--name accounts \--schema ./src/schema.graphql \--routing-url http://localhost:4002Note: We've used the
\character in this command to improve legibility by putting each command-line option on its own line. If you choose to type the entirerover subgraph publishcommand on a single line, you don't need to include the\.You'll see the following message:
The host localhost is not routable via the public internet. Continuing the publish will make this subgraph reachable in local environments only. Would you still like to publish? [y/N]Go ahead and tap theykey. We'll stick to local environments for this course!If all is well in the world, running this command should output a message confirming that the subgraph has been published and the supergraph has been updated!
Great, that's the accounts subgraph taken care of: let's do the same for messages! Navigate up one level in your terminal, and into the messages directory. We'll fill out the same command using our messages subgraph's details.
rover subgraph publish <APOLLO_GRAPH_REF> \--name messages \--schema ./src/schema.graphql \--routing-url http://localhost:4001
With that, our subgraph schemas are published and ready to go.
Up next
With our setup out of the way, let's get a feel for what GraphQL subscriptions are and how they fit into a federated architecture.
Share your questions and comments about this lesson
Your feedback helps us improve! If you're stuck or confused, let us know and we'll help you out. All comments are public and must follow the Apollo Code of Conduct. Note that comments that have been resolved or addressed may be removed.
You'll need a GitHub account to post below. Don't have one? Post in our Odyssey forum instead.
