Overview
It's time to write some queries, and see our server return some (mocked) data!
In this lesson, we will:
- Learn how to navigate Apollo Sandbox Explorer
- Save operations for future use
🚀 Exploring our first query
To write our test query, we'll use Apollo Sandbox. Sandbox is free to use and doesn't require an account. It's part of the Apollo GraphOS platform, and helps with local graph development.
Apollo GraphOS is a complete cloud platform for building, managing, and scaling your graph. GraphOS provides a set of tools and services so that product developers can focus on building better apps, faster.
With Sandbox, we can load a GraphQL server's schema and explore it using some cool GraphOS features such as a schema reference and the Explorer.
The Explorer is a powerful web IDE for creating, running, and managing GraphQL operations. It lets us build operations easily and quickly, look at our operation history, peek at response hints and share operations with others.
Let's make sure our server is running (npm run dev). Let's click the link it outputs, to http://localhost:4000. This opens up the Explorer environment automatically, and it's all configured out-of-the-box for our schema.
Exploring the Explorer
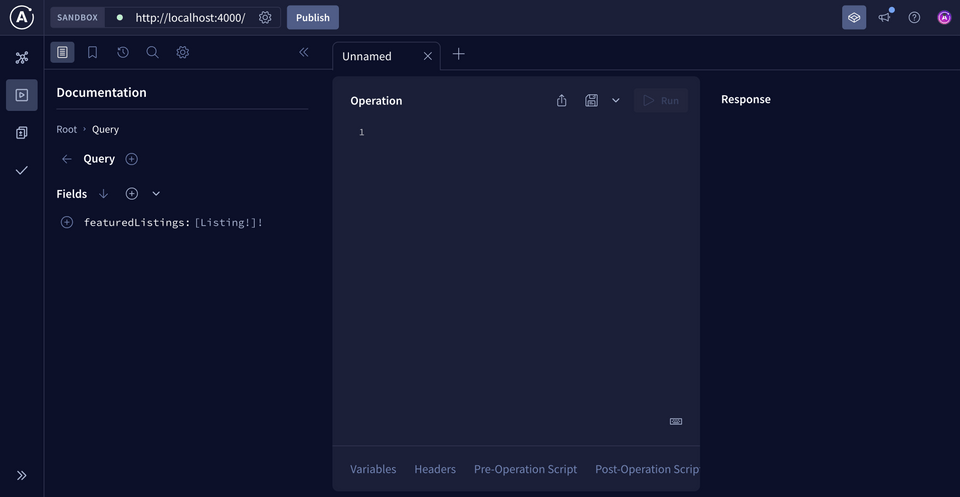
When we land in the Explorer, we'll see an interface connected to localhost:4000. It should look something like this:
Building a query
The Operation panel in the middle is where we create queries. The Explorer might have already filled in a default operation. Let's open up a new workspace tab with the plus (⊕) button for a fresh start.
We can write the operation manually, or add fields from the Documentation panel on the left: it enables you to drill down into your schema's fields, starting at the entry points of the Query type.
Clicking on the plus (⊕) button next to a field automatically adds that field to our current operation. This is a handy way to assemble complex queries without needing to remember your schema's exact structure or GraphQL syntax.
Let's add featuredListings to our first query.
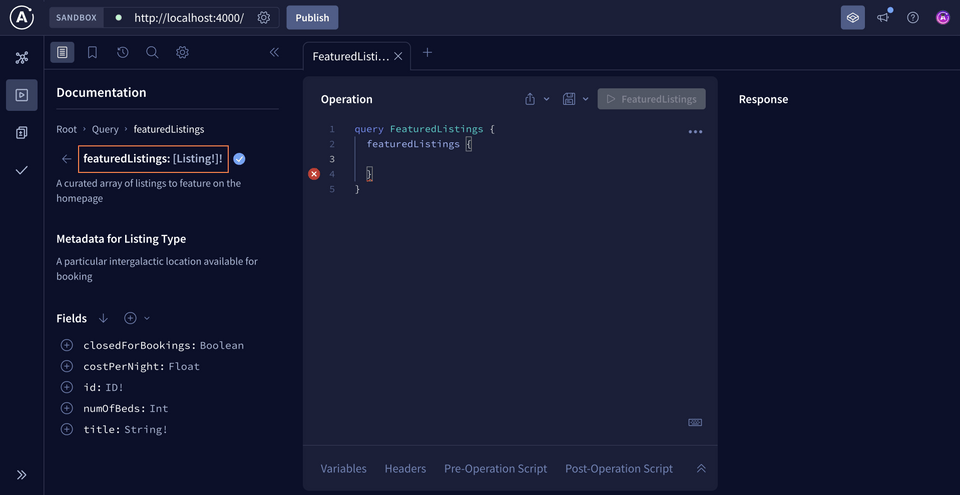
We'll see that the Documentation tab has updated, showing us the different fields that we can add to get data for each object returned as a Listing type. We can click on the plus button by "id" to add it to our query.
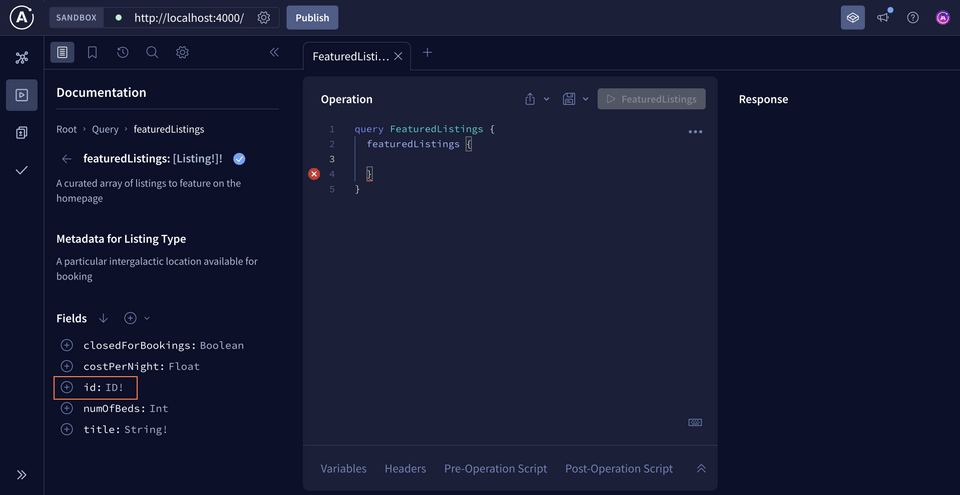
This automatically updates the Operation panel with the field we selected.
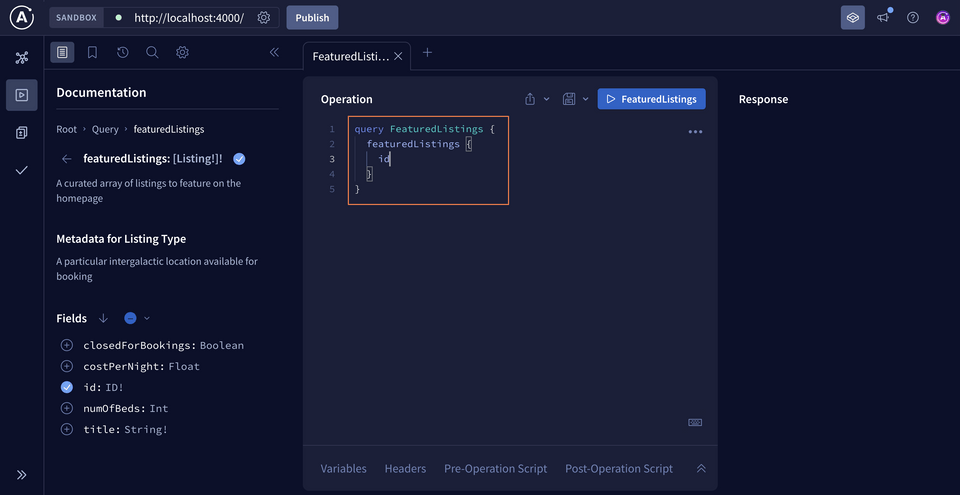
Here's what our query should look like:
query FeaturedListings {featuredListings {id}}
Turning on mocks
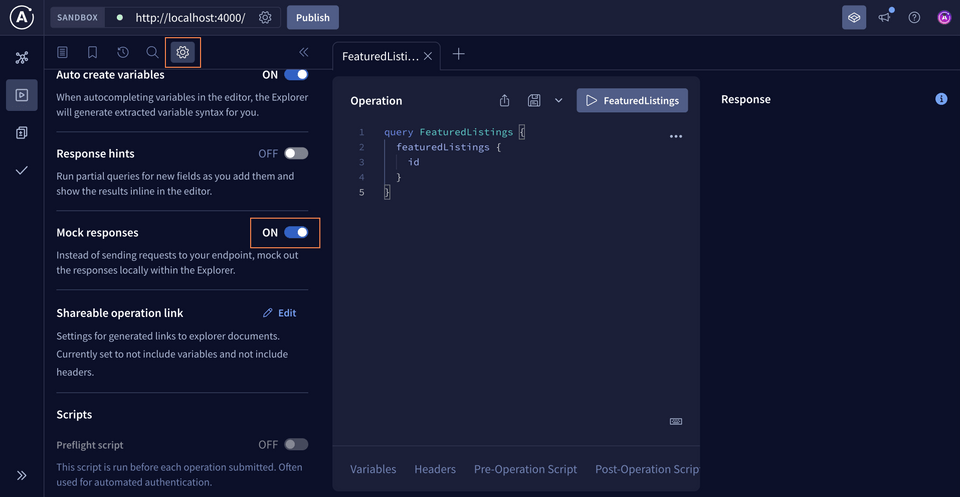
If we run this operation right now, we'll see an error. Our server isn't actually configured to return data just yet. Luckily, Explorer has us covered: we can turn on mocked responses for every field in our schema.
Open up the Settings panel on the left-hand side of the Explorer. Scroll down to find the Mock Responses section, and toggle it on.
Running the query
At the top of the Operation panel is the button to run our query. Let's click it now and see what happens:
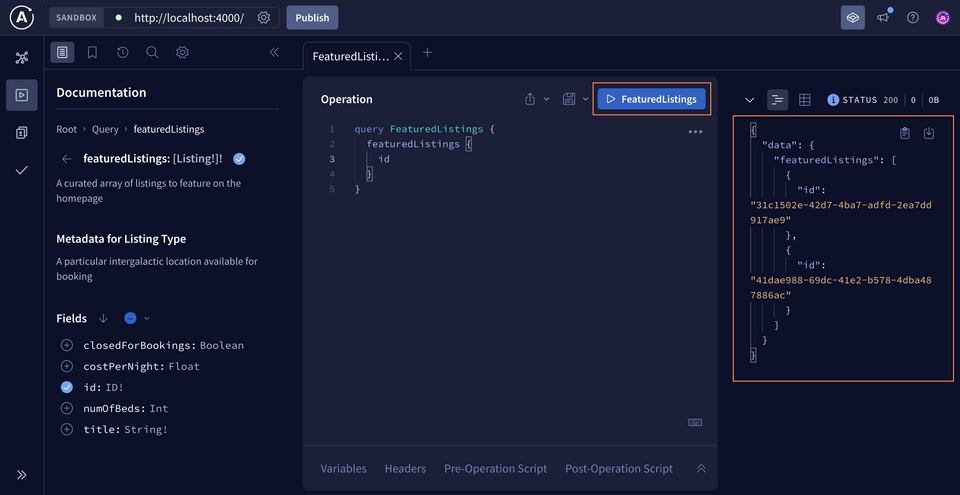
The Response panel on the right contains an object with a couple of listing IDs!
Adding all fields
Right now, we've selected only the featuredListings and id fields, but the Explorer also has a way to add all fields to an operation at once. When we click the dropdown by the Fields subheading, we'll see that we have two options.
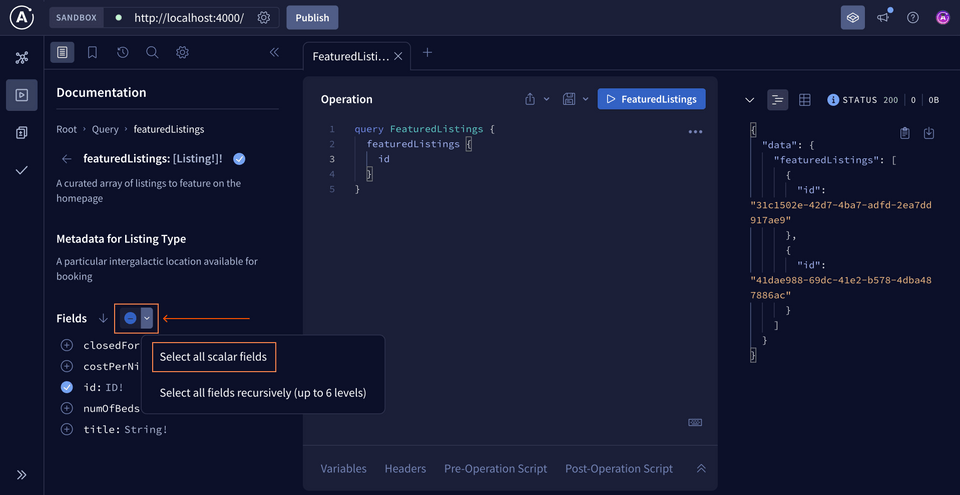
First, we have the option to Select all scalar fields. This will select all of the fields on the Listing type that return a value that does not have additional subfields.
Click Select all scalar fields. We'll see the title, numOfBeds, costPerNight, and closedForBookings fields have been added to our query.
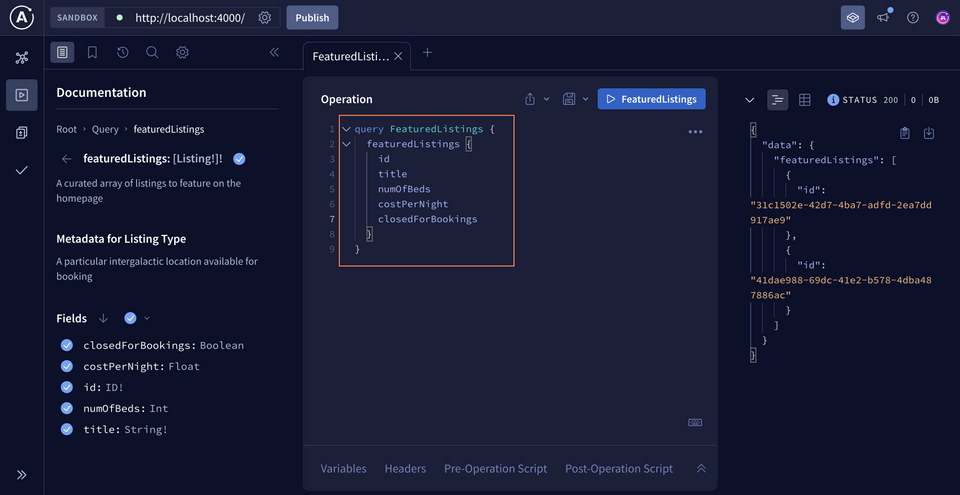
All of our scalar fields are taken care of, but we'll notice there's a second option in the dropdown: Select all fields recursively. This option lets us add all of a type's fields, and any of those field's subfields, all at once; this is particularly important when a field returns an object type that has its own set of fields. We'll see this shortly when we add to our schema!
Running the query
Your completed operation should match the following:
query FeaturedListings {featuredListings {idtitlenumOfBedscostPerNightclosedForBookings}}
Click the blue run button to submit the query!
Your response should look something like the following:
Saving an operation
We've already spent the time building out the FeaturedListings operation, so let's take advantage of another Explorer feature that makes constructing it again even easier. (You'll need an Apollo account for this part!)
At the top of the Operation panel, we'll find a save icon button.
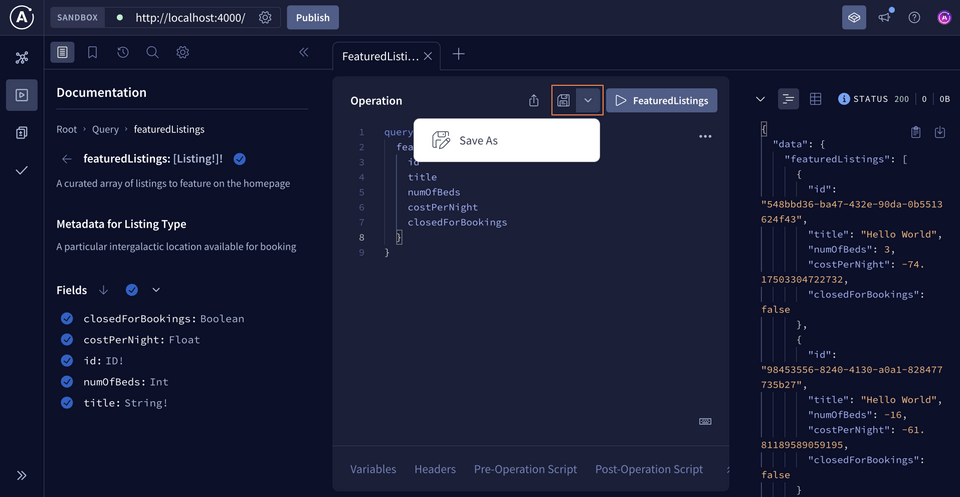
Clicking the Save as option from the dropdown opens a modal where we can give our operation a name, and save it to an operation collection.
With a collection, we can store a group of operations in a place that's quick to access when we want to test future changes to our schema.
Let's start by giving our operation the name FeaturedListings so that we can locate it when we need it again. Next, in the Select a collection dropdown, let's select the option under Sandbox to create a new default collection.
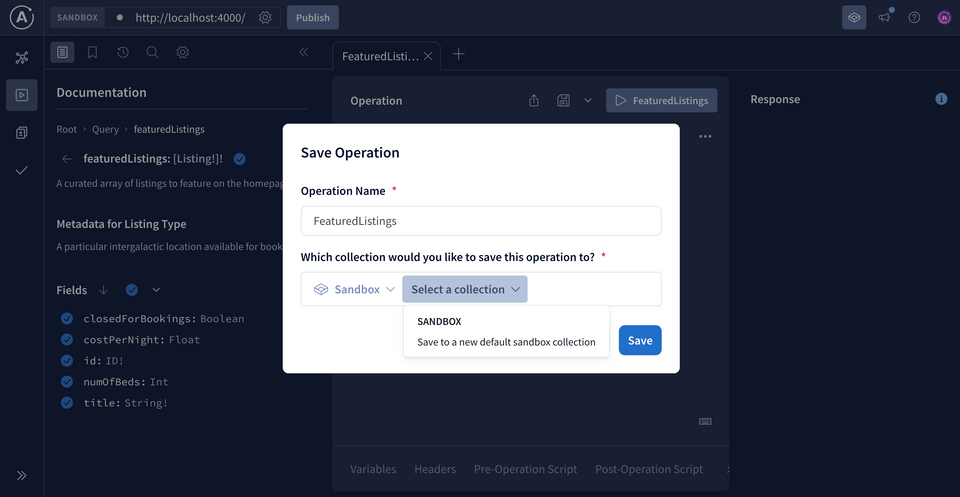
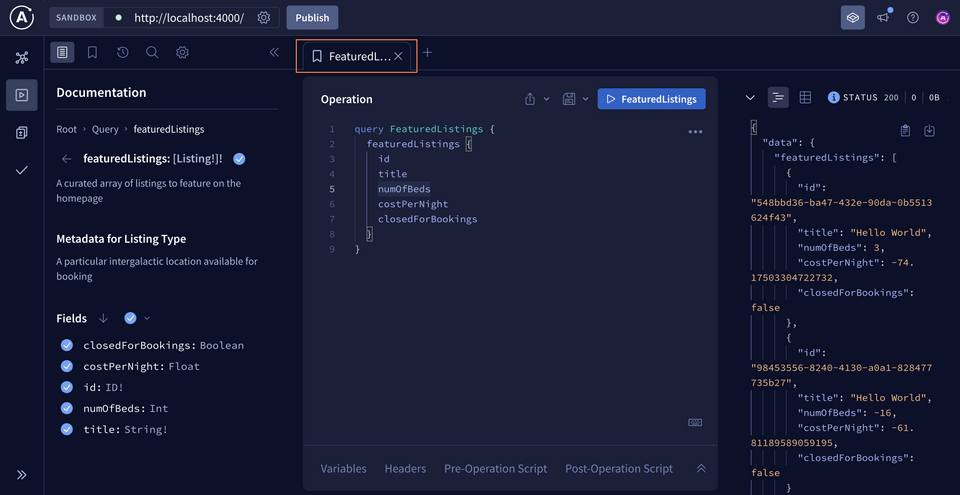
After we click the Save button, we'll see that our operation's tab now has the name we assigned to it! Additionally, we'll see a bookmark icon that indicates that this operation is saved to a collection.
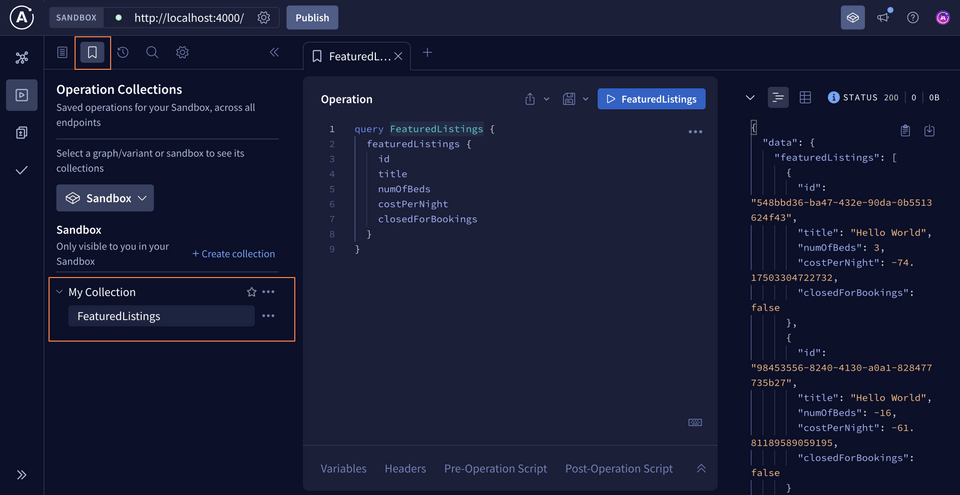
We can use the panel on the left of the Explorer to access operations that we've saved to a collection. Clicking the bookmark icon at the top of the menu opens up all of our Operation Collections, where we can see our FeaturedListings operation has been saved for quick access!
The Schema tab
Before we leave the Sandbox environment, let's check out our schema; it's accessible under the first tab in our main navigation.
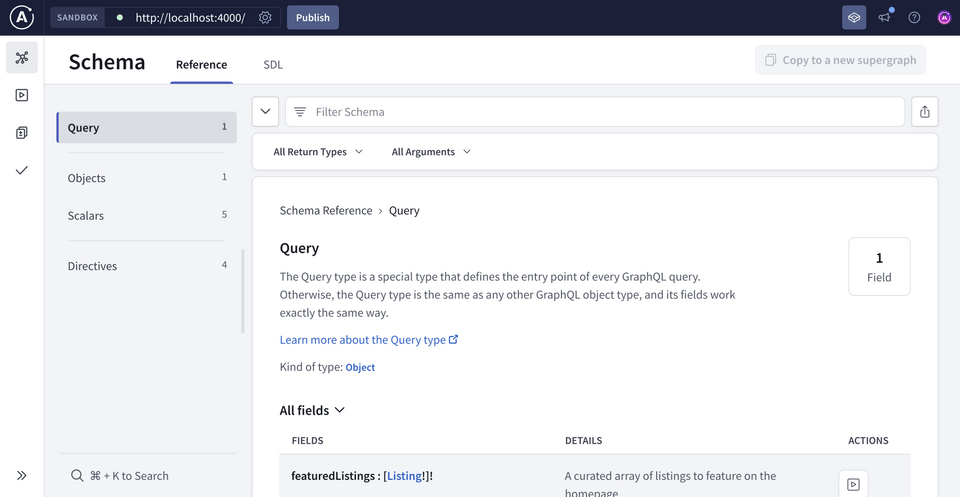
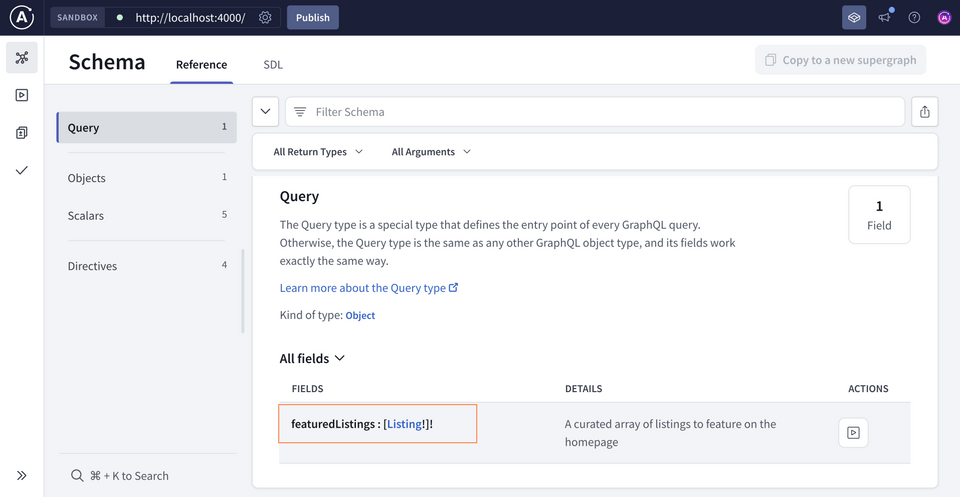
Here we have a full view and reference into our schema! It's pretty sparse right now, but we can see our Query type with a featuredListings field that returns a [Listing!]! type.
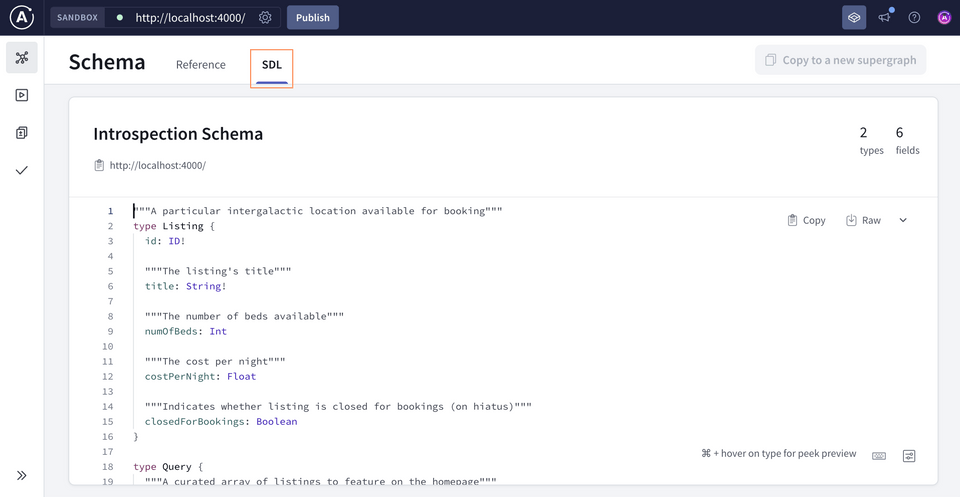
In the SDL tab, we can also see the schema in SDL syntax. This is the actual schema that our server is running its requests against!
Practice
Key takeaways
- The Explorer is a full-fledged IDE that introspects a running server's schema and allows us to build and send queries.
- We can use operation collections to store operations we've already built for future use.
Up next
The Explorer can do so much more, but this is all we'll cover for now. It's time to move onto our next topic—hooking up a real data source!
Share your questions and comments about this lesson
Your feedback helps us improve! If you're stuck or confused, let us know and we'll help you out. All comments are public and must follow the Apollo Code of Conduct. Note that comments that have been resolved or addressed may be removed.
You'll need a GitHub account to post below. Don't have one? Post in our Odyssey forum instead.