👋 Welcome to Part II of our Lift-off series!
In Lift-off I, we built the homepage grid feature for the Catstronauts app, our learning platform for cats who want to explore the universe. We designed that feature with a schema-first approach and mocked static data. We displayed a single mocked entry multiple times to populate the cards of our homepage grid.
Now it's time to connect this app to real live data!
By the end of this course, your Catstronauts homepage will look like this:
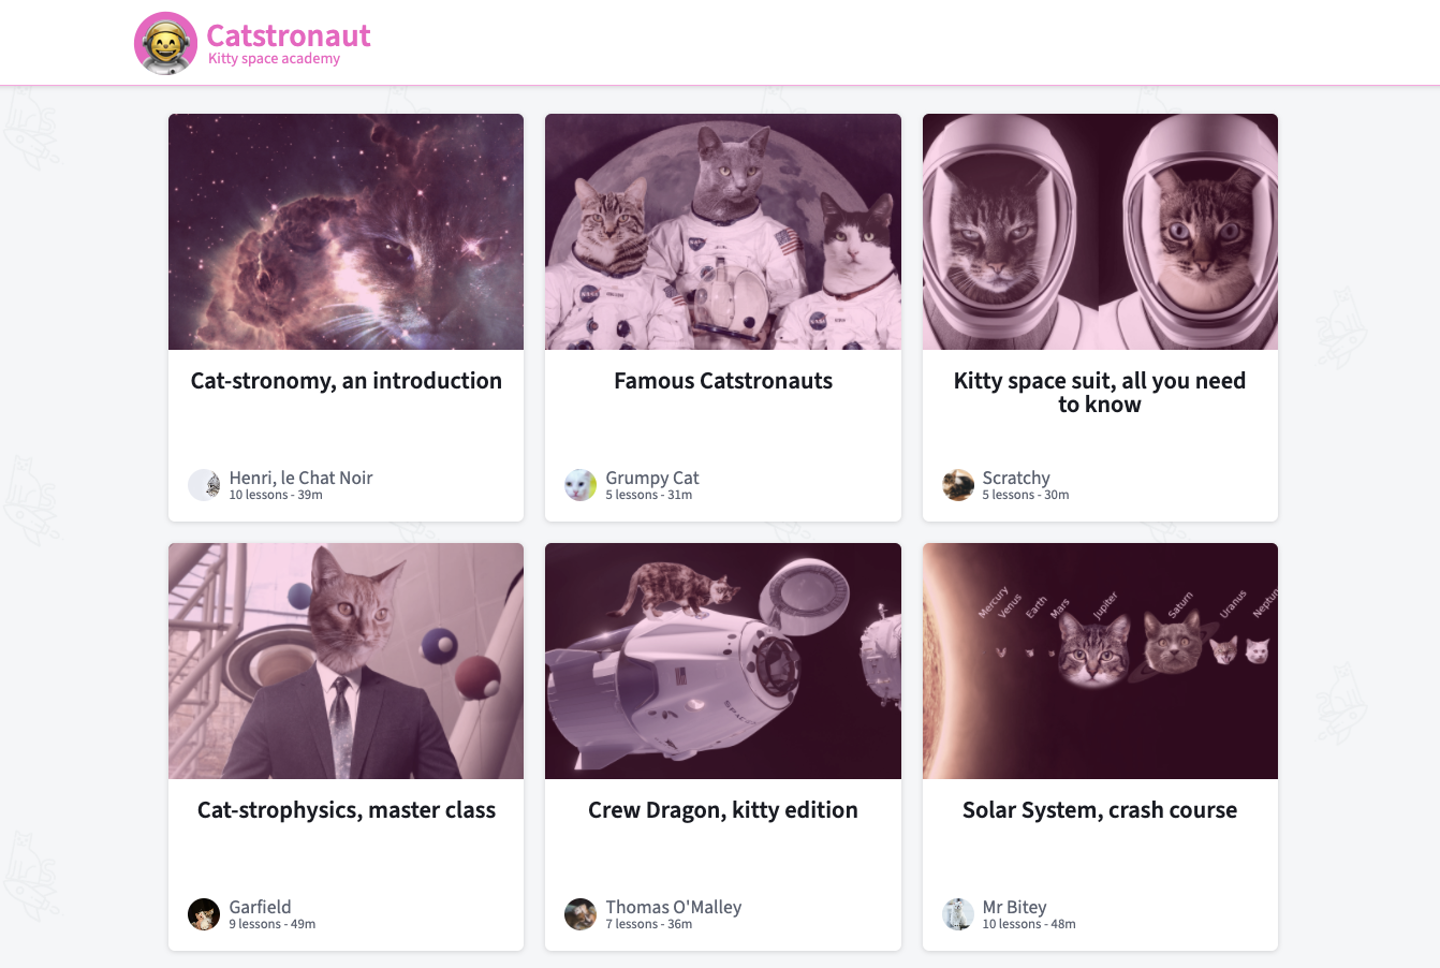
Ignition sequence...
Prerequisites
Our app uses Node.js on the backend and React on the frontend. We recommend using the latest version of Node.
For this course, we'll be working only on the backend.
Clone the repository
Note: This course is available in both JavaScript and TypeScript. Confirm your language of choice at the top of the lesson before continuing.
In the directory of your choice with your preferred terminal, clone the app's starter repository:
git clone https://github.com/apollographql/odyssey-lift-off-part2
Project structure
This repo picks up where Lift-off I left off. Our project is a full-stack app with the backend app in the server/ directory and the frontend app in the client/ directory.
You'll also find a final/ folder that contains the final state of the project once you've completed the course. Feel free to use it as a guide!
Here's the file structure:
📦 odyssey-lift-off-part2┣ 📂 client┃ ┣ 📂 public┃ ┣ 📂 src┃ ┣ 📄 index.html┃ ┣ 📄 package.json┃ ┣ 📄 README.md┃ ┣ 📄 vite.config.js┣ 📂 server┃ ┣ 📂 src┃ ┃ ┣ 📄 index.js┃ ┃ ┣ 📄 schema.js┃ ┣ 📄 README.md┃ ┣ 📄 package.json┣ 📂 final┃ ┣ 📂 client┃ ┣ 📂 server┗ 📄 README.md
Now, open the repository in your favorite IDE.
Let's start with the server app.
In a terminal window, navigate to the repo's server directory and run the following command to install dependencies and run the app:
npm install && npm start
npm install; npm start
Note: We recommend using the latest LTS version of Node. To check your Node version, run node -v.
If all goes well, you'll see the installation complete and a message in the console indicating that the server is running.
Next, the client app.
In a new terminal window, navigate to the repo's client directory and run the following to install dependencies and start the app:
npm install && npm start
npm install; npm start
The console should show a bunch of output and a link to the running app at localhost:3000. You can navigate to http://localhost:3000 in the browser and see our homepage, which shows one Track card repeating a few times. This is the mock data we set up in Part I.
To understand what our GraphQL server is missing to work with live data, and how it will know where to fetch what, let's take a step back and explore the journey of a GraphQL query.
Journey of a GraphQL query
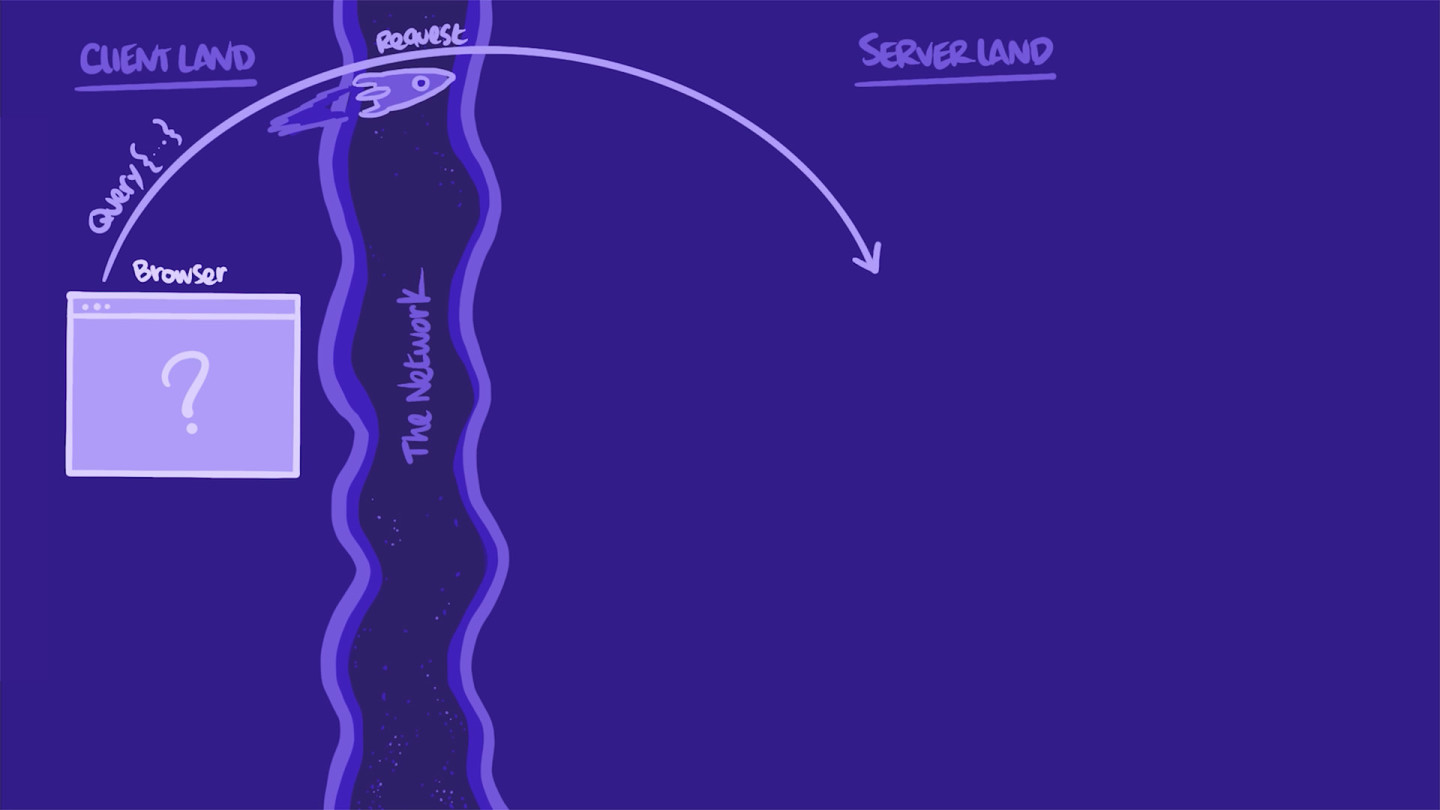
In client-land
Our web app needs to fetch remote data to populate its homepage.
To get that data, it sends a query to our GraphQL server. The app shapes the query as a string that defines the selection set of fields it needs. Then, it sends that query to the server in an HTTP POST or GET request.
In server-land
When our server receives the HTTP request, it first extracts the string with the GraphQL query. It parses and transforms it into something it can better manipulate: a tree-structured document called an AST (Abstract Syntax Tree). With this AST, the server validates the query against the types and fields in our schema.
If anything is off (e.g. a requested field is not defined in the schema or the query is malformed), the server throws an error and sends it right back to the app.
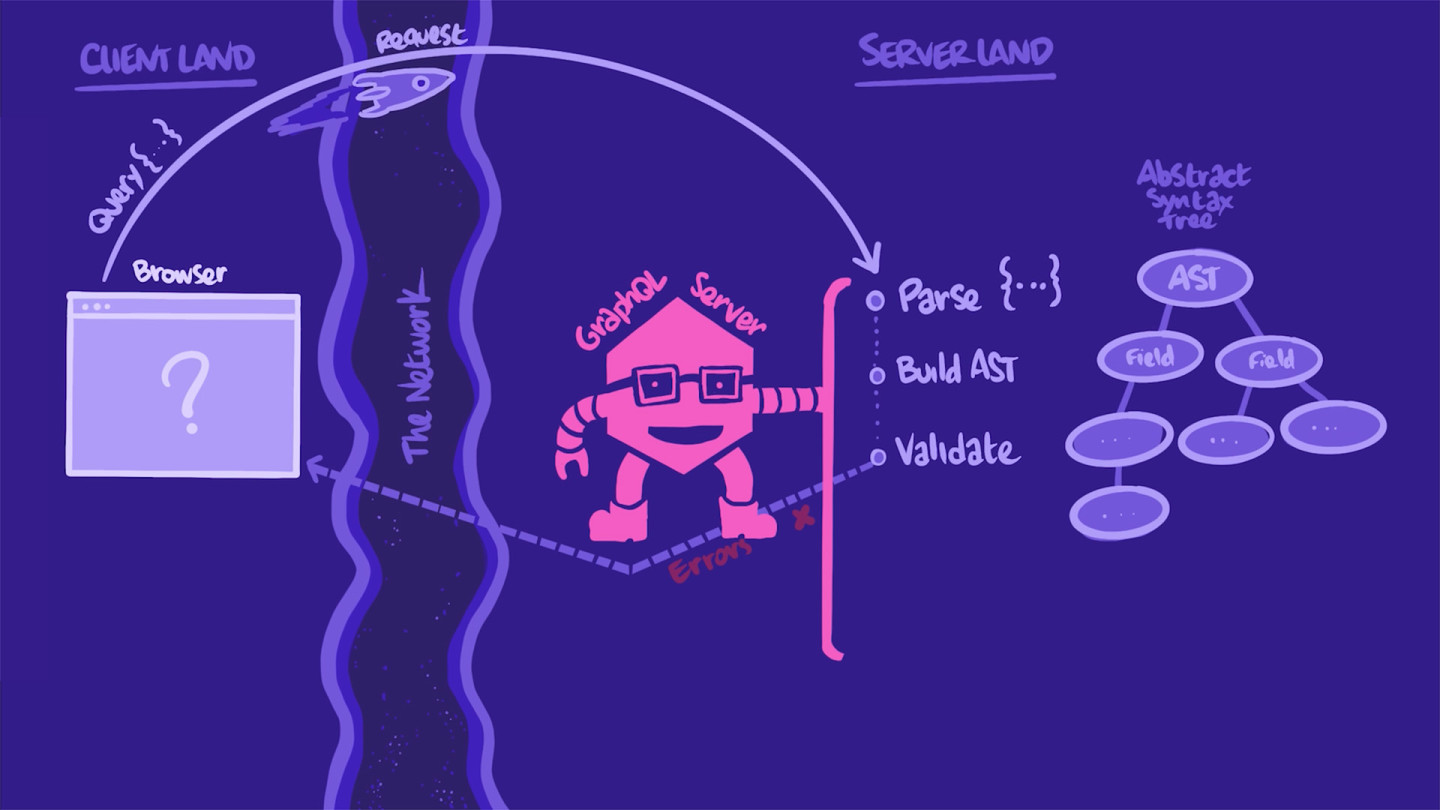
In this case, the query looks good, and the server can "execute" it. Meaning, the server can continue its process and actually fetch the data. The server walks down the AST.
For each field in the query, the server invokes that field's resolver function. A resolver function's mission is to "resolve" its field by populating it with the correct data from the correct source, such as a database or a REST API.
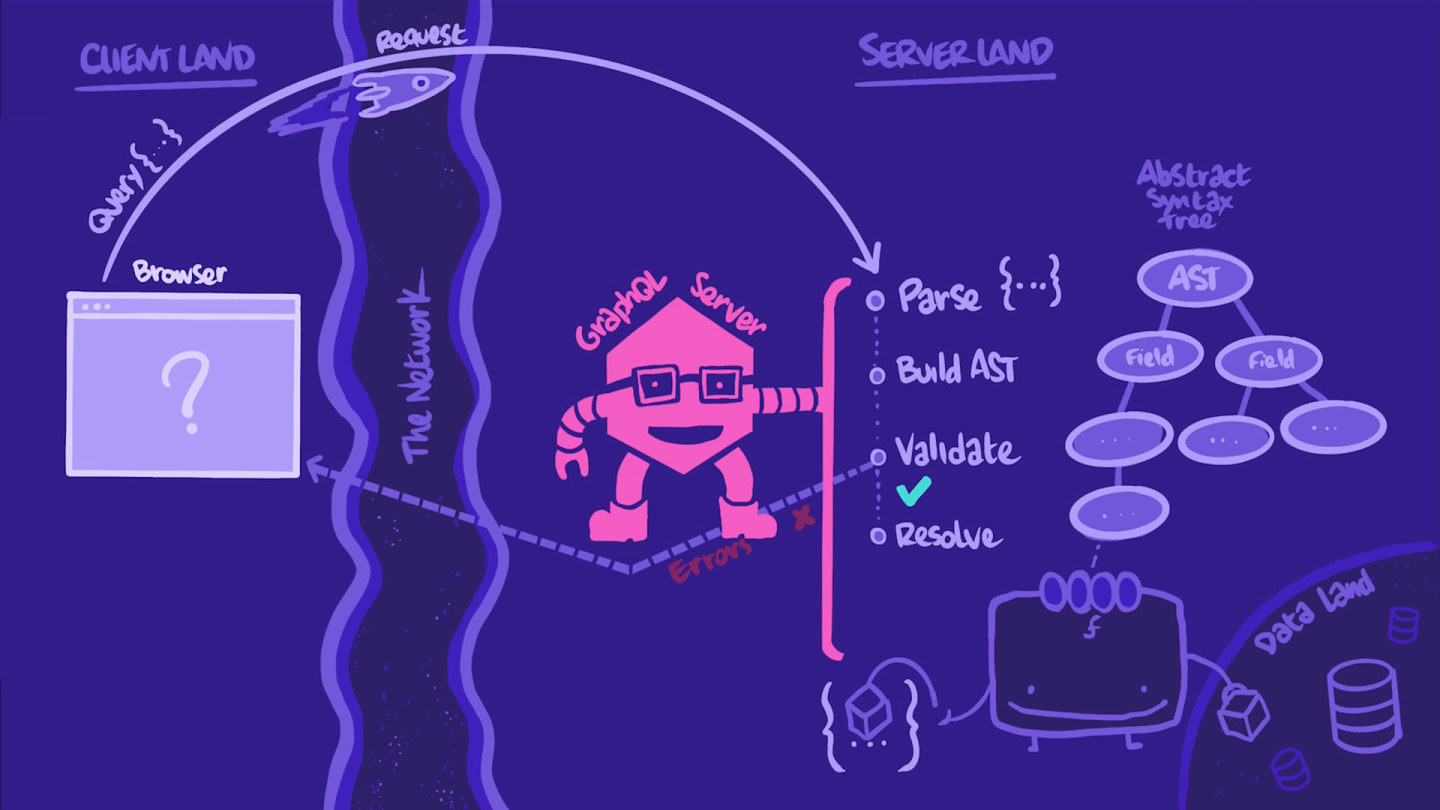
As all of the query's fields are resolved, the data is assembled into a nicely ordered JSON object with the exact same shape as the query.
The server assigns the object to the HTTP response body's data key, and it's time for the return trip, back to our app.
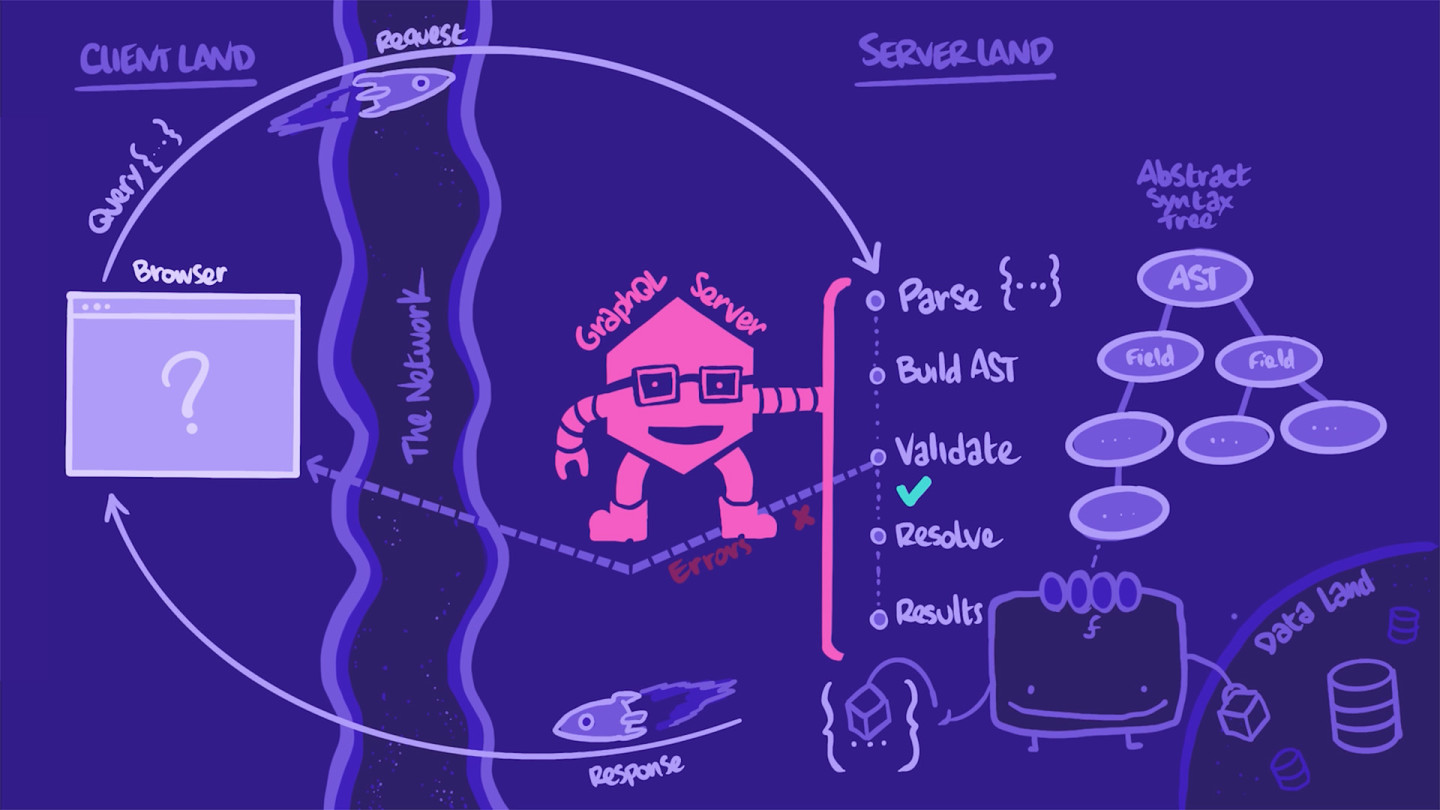
Back to client-land
Our client receives the response with exactly the data it needs, passes that data to the right components to render them, and voilà, our homepage is displaying its cards from remote data.
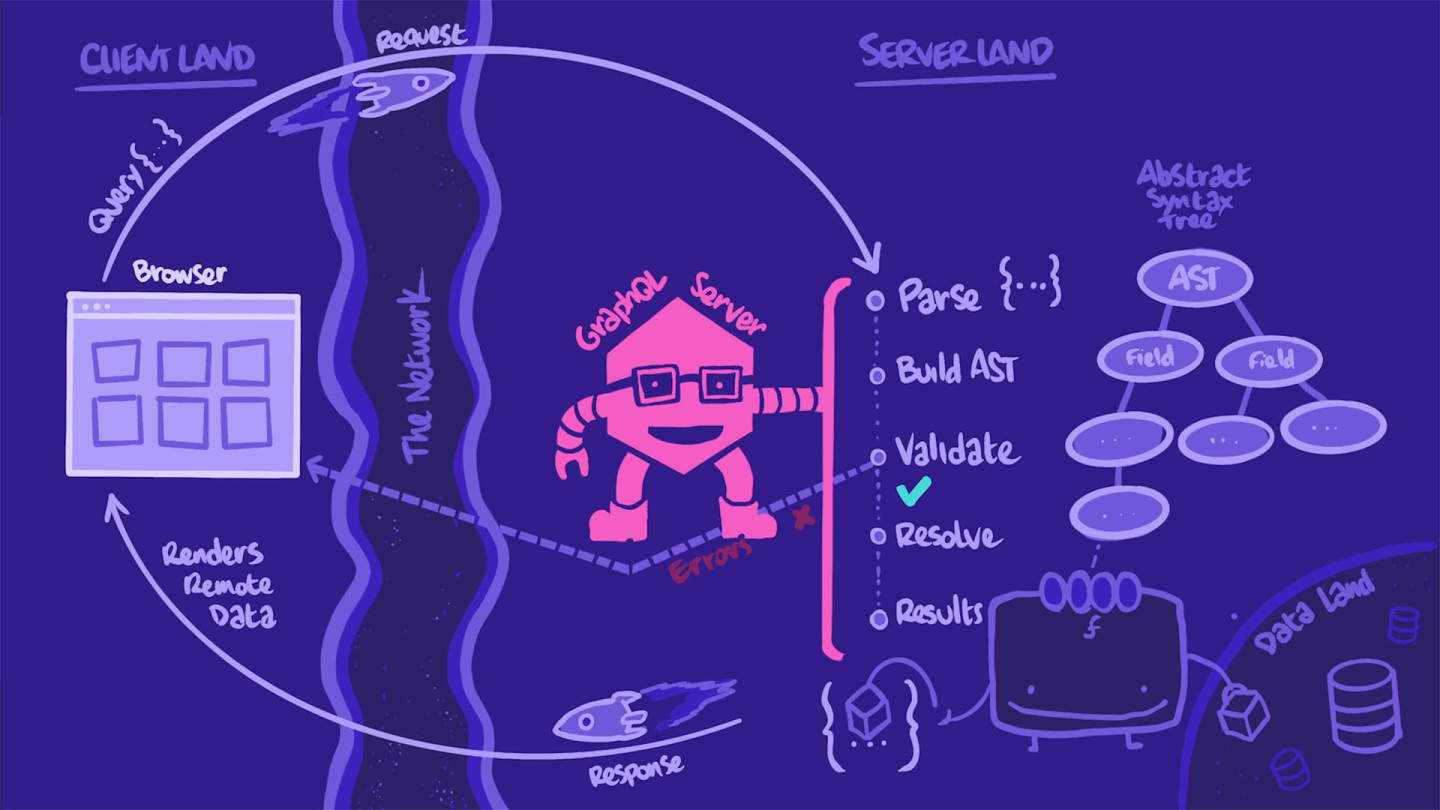
And that's the journey of a GraphQL query!
Share your questions and comments about this lesson
Your feedback helps us improve! If you're stuck or confused, let us know and we'll help you out. All comments are public and must follow the Apollo Code of Conduct. Note that comments that have been resolved or addressed may be removed.
You'll need a GitHub account to post below. Don't have one? Post in our Odyssey forum instead.