Overview
Welcome! In this first course in Odyssey's Kotlin series, we'll enable an app to communicate with a GraphQL server by adding the Apollo Kotlin library. We'll start by downloading a schema, running codegen, and writing queries and mutations. By the end of the series, you'll be equipped to handle errors, pagination, authentication, and subscriptions!
In this lesson, we will:
- Learn about what we're building, and the technologies that help us build it
- Set up our project environment
What is GraphQL?
Let's begin with the most important question of the course. What is GraphQL?
GraphQL is the developer-friendly query language for the modern web. It transforms how apps fetch data from an API, enabling you to get exactly what you need with a single query—instead of wrangling responses from a patchwork of REST endpoints.
With a strongly typed schema at its core, GraphQL helps you define relationships between data across any number of systems, empowering you to focus on what your data can do instead of where it's stored.
Throughout this course, we'll learn how to integrate GraphQL with our Android app, making it easier to serve up data to our users and build faster than ever before. Get ready to roll up your sleeves, write some code, test your understanding, and build something cool!

What we're building
We're going to build an app that lets us "book a seat" on any of the rockets that have been sent into space by SpaceX. We'll connect to a GraphQL server that's hosted on Heroku and is powered by Apollo Server.
If you're curious about how to build your own GraphQL server, check out Odyssey's backend courses, available in a variety of programming languages.
Prerequisites
To follow along...
- You should be familiar with basic programming concepts in Kotlin. (We assume some prior experience with Android development.)
- You'll need Android Studio installed.
- Bonus: The course is built using Jetpack Compose, Kotlin coroutines, Navigation Component, and Coil. You won't need any prior experience with these tools.
Clone the repository
In the directory of your choice with your preferred terminal, clone the app's starter repository:
git clone https://github.com/apollographql/apollo-kotlin-odyssey
We'll work out of the start directory.
Note: If you get stuck at any time during the course, feel free to check out the final directory for some help: it contains the completed app.
Project setup
Navigate to the apollo-kotlin-odyssey directory, and open up the start folder in Android Studio.

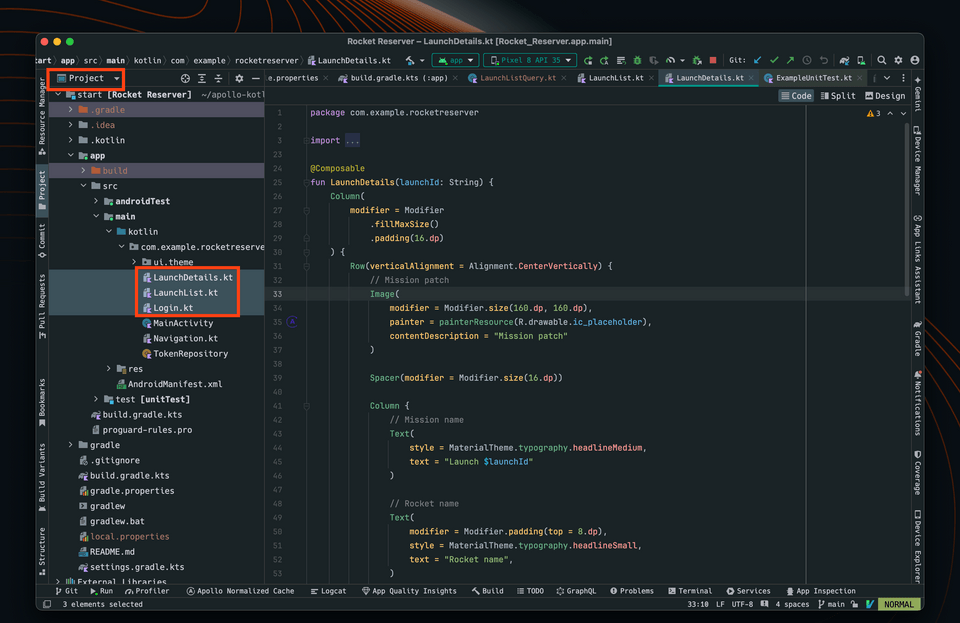
Android Studio will take some time to index the contents of the project. Take some time to look around. You should see three files:
LaunchList.ktis the first screen. You will display a list of launches there.LaunchDetails.ktwill display details about a launch and give you the opportunity to book a seat.Login.ktwill allow you to log in before booking the seat.
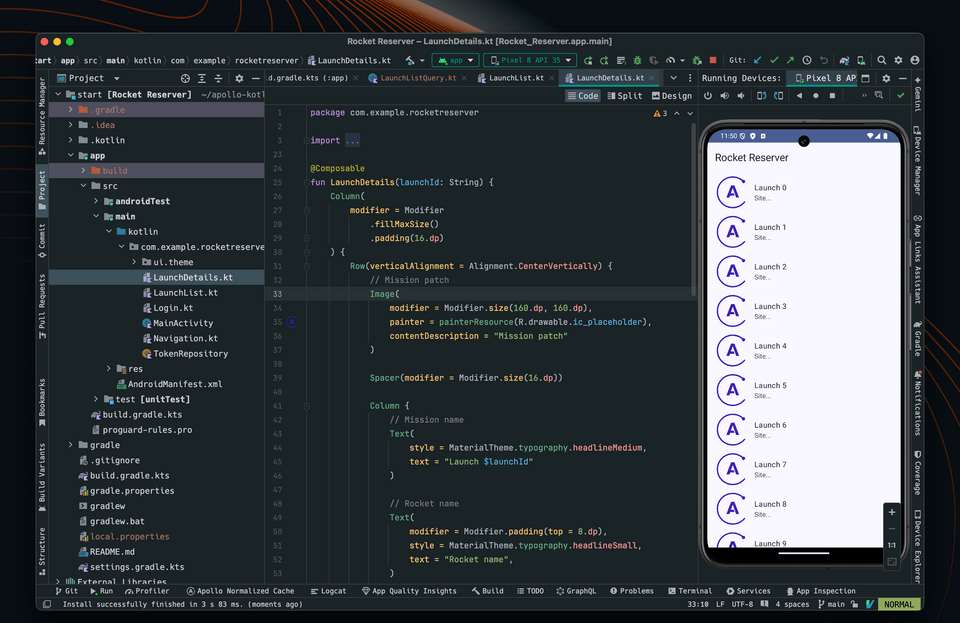
Now build and run the project.
You should see a list with static placeholder data:

Install the Apollo GraphQL plugin for Android Studio
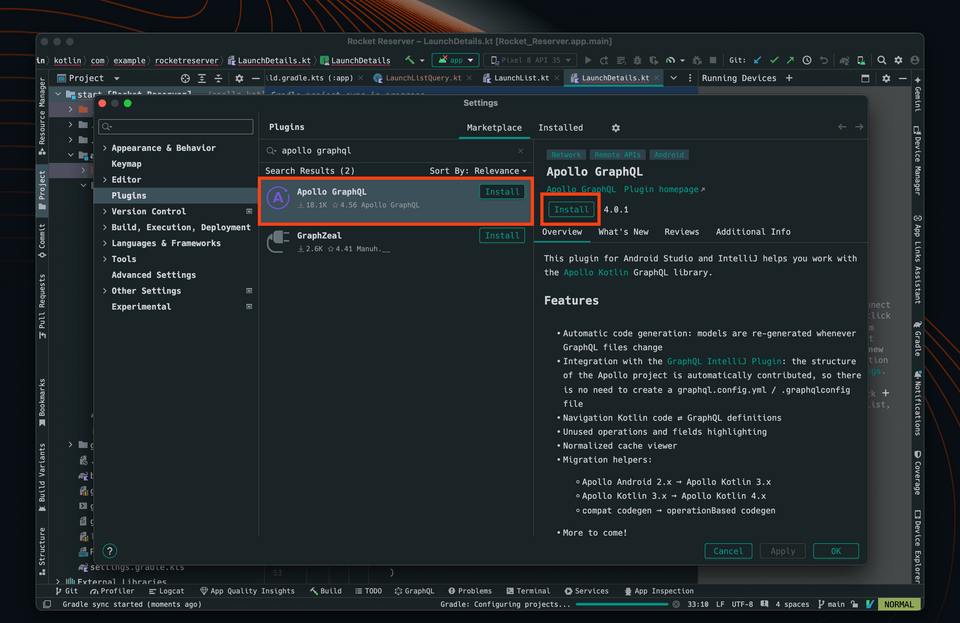
We recommend installing the Android Studio Plugin, which has a ton of helpful features including autocomplete for GraphQL files, automatic code generation, and more.
Go to Android Studio -> Settings... -> Plugins. In the "Marketplace" tab, search for "Apollo GraphQL" and install the plugin.

Now, let's add Apollo Kotlin to the project.
Visit Apollo Kotlin on GitHub
You can view the Changelog for every version of Apollo Kotlin on our GitHub releases page. It is also displayed at the top of the apollo-kotlin repo.
This course uses 4.1.0 because it is the latest version at the time of writing. Feel free to use a more recent version if one is available.
Apply the Apollo Gradle plugin
Add the Apollo plugin to the version catalog in gradle/libs.versions.toml. The Apollo plugin ID is com.apollographql.apollo:
[versions]# ...apollo = "4.1.0"[plugins]# ...apollo = { id = "com.apollographql.apollo", version.ref = "apollo" }
Then apply the Apollo plugin in app/build.gradle.kts. There are two build.gradle.kts in the project - make sure to use the one in the app directory.
Note: for simplicity, we are loading the plugin and applying it at the same time. In a real app, you may want to load the plugin in the root project to avoid classpath issues.
plugins {alias(libs.plugins.android.application)// ...alias(libs.plugins.apollo)}
The plugin contains the compiler that generates models from your queries when you build your project.
Configure the Apollo Gradle plugin
Configure the Apollo Gradle plugin to specify the package in which the Kotlin files will be generated. Put this at the end of app/build.gradle.kts:
apollo {service("service") {packageName.set("com.example.rocketreserver")}}
Add dependencies
Now add apollo-runtime to the list of dependencies. This is the part of the SDK that executes queries and parses responses.
First add the dependency to the version catalog:
[libraries]# ...apollo-runtime = { module = "com.apollographql.apollo:apollo-runtime" }
Then add the dependency to the app/build.gradle.kts file:
dependencies {// ...implementation(libs.apollo.runtime)}
Android Studio will display a yellow banner, A project sync may be necessary for the IDE to work properly. Click Sync Now.
Up next
Your project should now be ready to use the Apollo Kotlin SDK. Next, we'll explore the GraphQL API we'll connect to our project.
Share your questions and comments about this lesson
This course is currently in
You'll need a GitHub account to post below. Don't have one? Post in our Odyssey forum instead.