Overview
Welcome! In this first course in Odyssey's Swift series, we'll enable an app to communicate with a GraphQL server by adding the Apollo iOS SDK. We'll start by downloading a schema, running codegen, and writing queries and mutations. By the end of the series, you'll be equipped to handle errors, pagination, authentication, and subscriptions!
In this lesson, we will:
- Learn about what we're building, and the technologies that help us build it
- Set up our project environment
What is GraphQL?
Let's begin with the most important question of the course. What is GraphQL?
GraphQL is the developer-friendly query language for the modern web. It transforms how apps fetch data from an API, enabling you to get exactly what you need with a single query—instead of wrangling responses from a patchwork of REST endpoints.
With a strongly typed schema at its core, GraphQL helps you define relationships between data across any number of systems, empowering you to focus on what your data can do instead of where it's stored.
Throughout this course, we'll learn how to integrate GraphQL with our frontend app, making it easier to serve up data to our users and build faster than ever before. Get ready to roll up your sleeves, write some code, test your understanding, and build something cool!

What we're building
We're going to build an app that lets us "book a seat" on any of the rockets that have been sent into space by SpaceX. We'll connect to a GraphQL server that's hosted on Heroku and is powered by Apollo Server.
If you're curious about how to build your own GraphQL server, check out Odyssey's backend courses, available in a variety of programming languages.
Prerequisites
To follow along...
- You should be familiar with basic programming concepts in Swift. (We assume some prior experience with iOS development.)
- You'll need a Mac as well as Xcode (v15.4), with the iOS component installed
- Bonus: The course is built using SwiftUI. You won't need any prior experience with SwiftUI, but we'll use it to illustrate how to use the Apollo iOS SDK.
Clone the repository
In the directory of your choice with your preferred terminal, clone the app's starter repository:
git clone https://github.com/apollographql/apollo-ios-odyssey
We'll work out of the starter directory.
Note: If you get stuck at any time during the course, feel free to check out the final directory for some help: it contains the completed app.
Project setup
Navigate to the apollo-ios-odyssey directory, and open up the starter folder in Xcode. Then, locate the RocketReserver.xcodeproj file and open it.
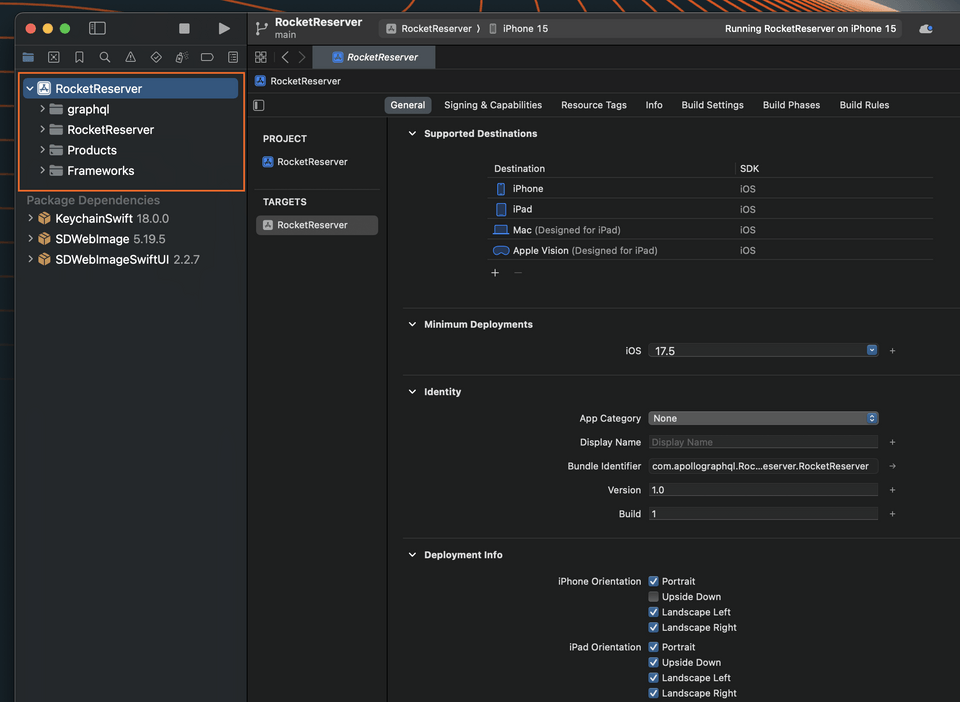
When the project opens, Swift Package Manager (SPM) will resolve some dependencies that you'll be using later in the project that are already set up:
If you build and run the project you should see a list with placeholder data:
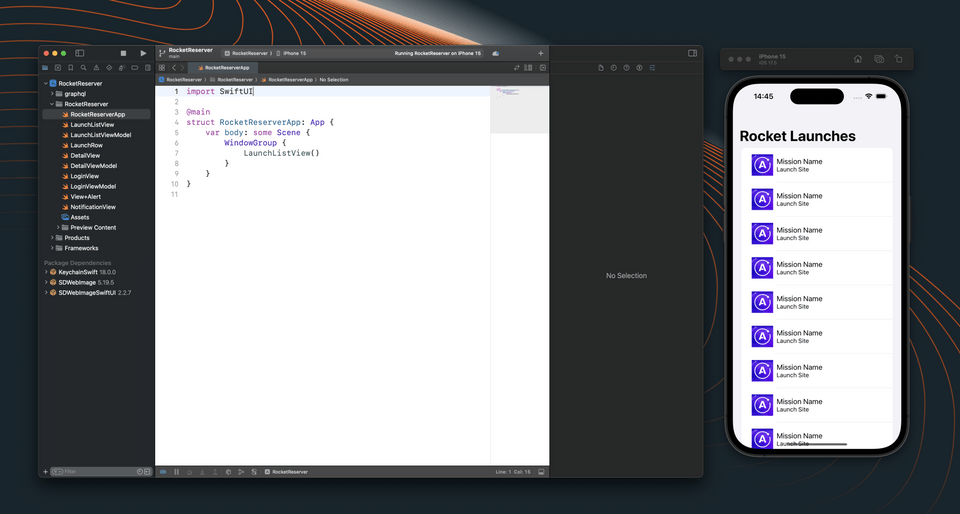
Next let's add Apollo as a dependency.
Adding the Apollo iOS SDK
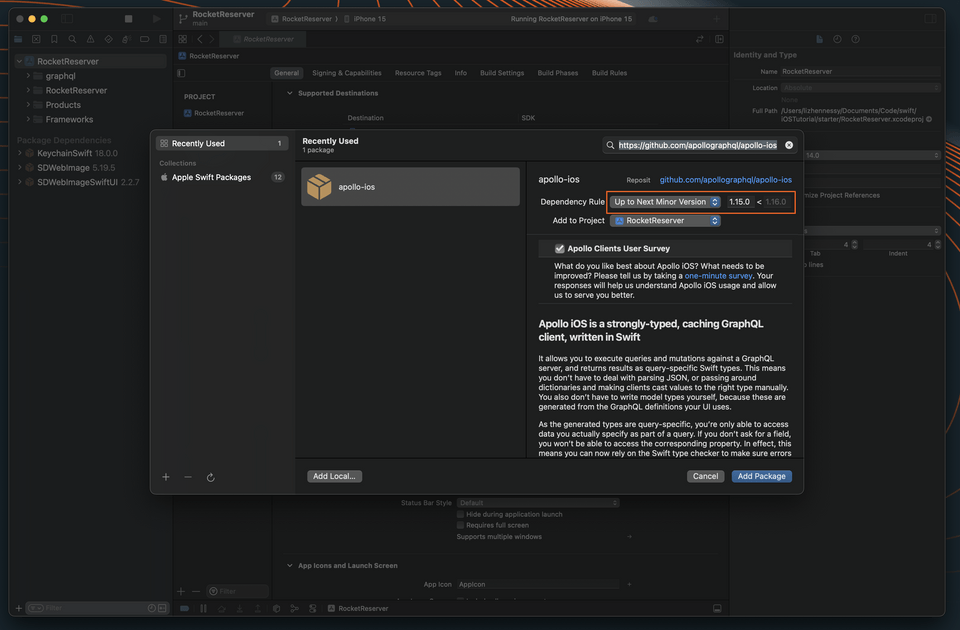
Go to File > Add Package Dependencies.... The Add Package dialog appears, by default with Apple packages.
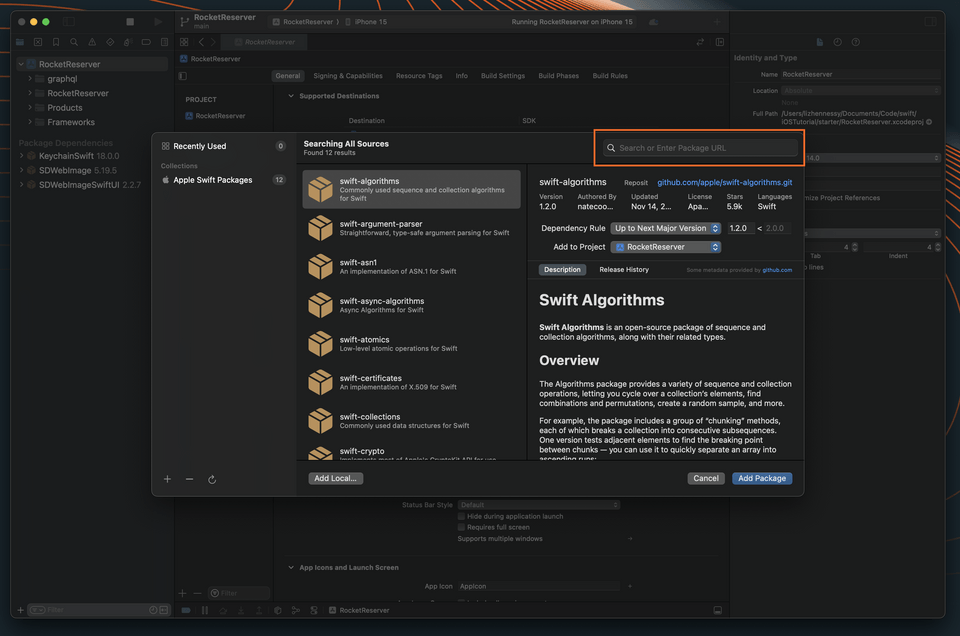
In the upper right-hand corner, paste the following link to the Apollo iOS repo into the search bar:
https://github.com/apollographql/apollo-ios
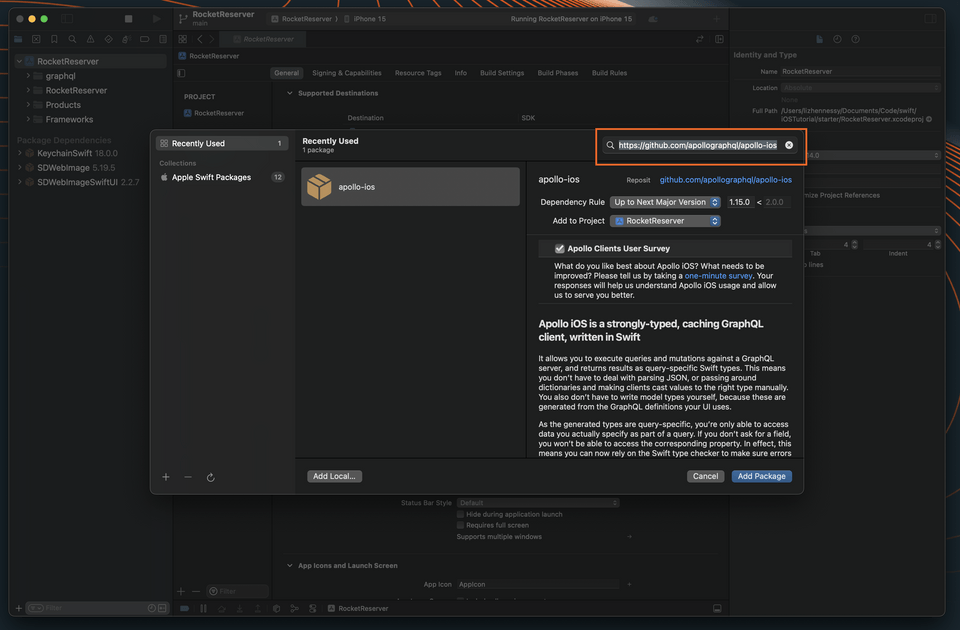
Select the latest minor version
Xcode will then show you the apollo-ios package and allow you to select a version in the right-hand panel. Select Up to Next Minor from the Version dropdown (At the time of writing, the current minor version is 1.15.x, note that minor breaking changes can occur between minor releases):
List the targets
Click Add Package. Once SPM is done checking out the package, a list of framework targets included in the library appears. For this tutorial, enable both Apollo and ApolloWebSocket packages, updating the Add to Target dropdown for each so it says "RocketReserver":
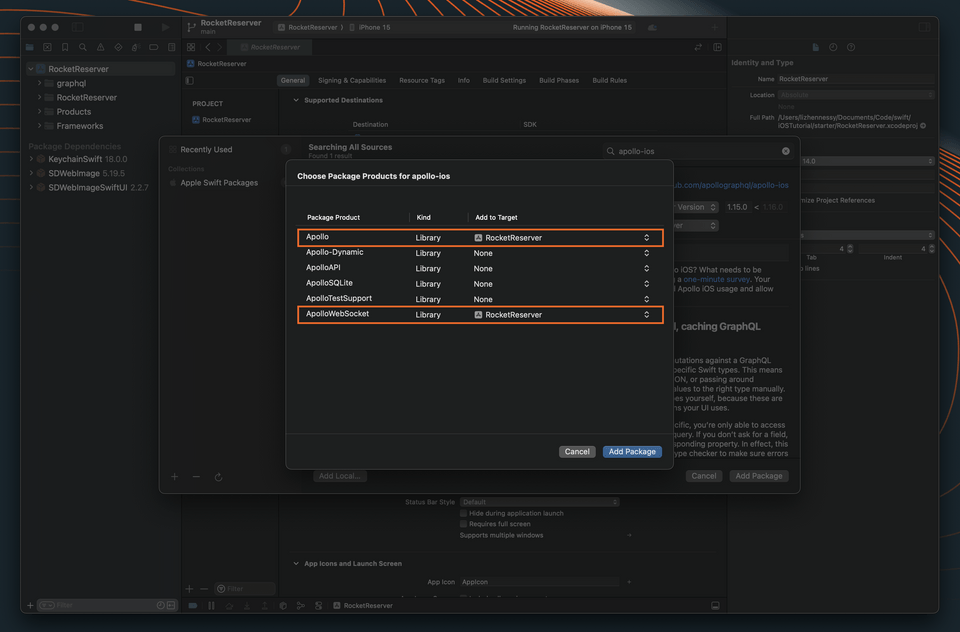
Note: Do NOT select the Apollo-Dynamic target; this is only for use for projects linking to our library dynamically. Most projects, including this one, will not need to do this.
Finish up
Click Add Package. SPM fetches your dependencies. When it completes, you can see them in the project navigator:
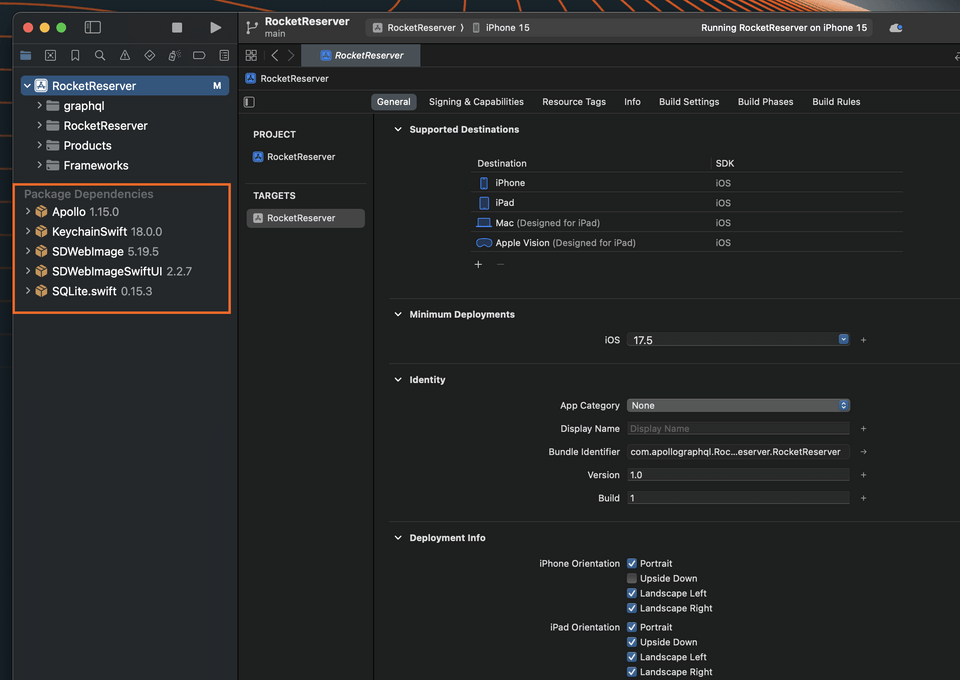
Note: Because SPM has not yet implemented Target-Based Dependency Resolution, you'll see the SQLite dependency even though you didn't select ApolloSQLite, the target which depends on it.
Up next
Your project should now be ready to use the Apollo iOS SDK. Next, we'll explore the GraphQL API we'll connect to our project.
Share your questions and comments about this lesson
This course is currently in
You'll need a GitHub account to post below. Don't have one? Post in our Odyssey forum instead.