Overview
Let's get to know our GraphQL API!
In this lesson, we will:
- Learn about the GraphQL schema
- Explore the GraphQL API using Apollo Sandbox
The GraphQL schema
We'll communicate with the GraphQL server running on Heroku to serve up our launches data—but first, we should get to know its schema. The GraphQL schema is a collection of types and fields that make up the comprehensive picture of everything we can do with the data in a GraphQL server. No actual data lives here; just the basic skeleton of the shapes that the live data will conform to. (Think of a blueprint!)
The schema has its own language called schema definition language, or SDL.
Note: We won't need to write SDL in this course; instead, we'll use the GraphQL server's schema to generate the code that we'll use in the frontend. With codegen, we can reduce the amount of time we spend manually writing operations. Instead, an automatic process can retrieve the information we need from the schema and output the code we'll use. We'll explore codegen more in the coming lessons.
We could take a look at the raw schema file that our GraphQL server uses, but there's a better way to get hands-on: using Apollo Sandbox!
Using Apollo Sandbox
Enter Apollo Sandbox. Sandbox is free to use and doesn't require an account. It's part of the Apollo GraphOS platform, and helps with local graph development.
Apollo GraphOS is a complete cloud platform for building, managing, and scaling your graph. GraphOS provides a set of tools and services so that product developers can focus on building better apps, faster.
With Sandbox, we can load a GraphQL server's schema and explore it using some cool GraphOS features such as a schema reference and the Explorer. The Explorer is a powerful web IDE for creating, running, and managing GraphQL operations. It lets us build operations easily and quickly, look at our operation history, peek at response hints, and share operations with others.
This link takes us directly to the Explorer, with an automatic connection to the GraphQL API we'll be using.
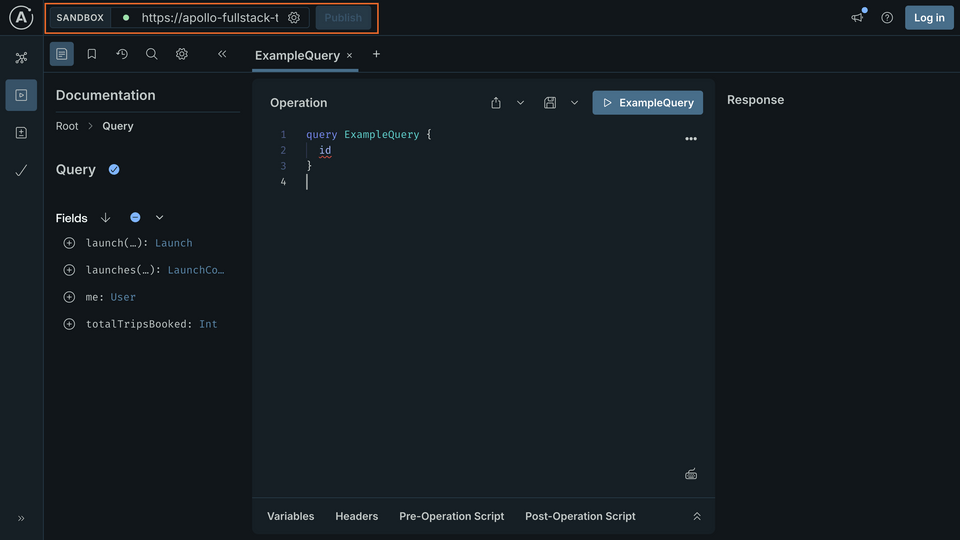
Note: We can tell that this Sandbox instance is pointed at our server because its URL, https://apollo-fullstack-tutorial.herokuapp.com, is in the box at the top left of the page. If Sandbox is properly connected, you'll see a green dot, which means we're good to go!
Exploring the schema
Awesome, let's check out our schema, which is the first tab in our main navigation.
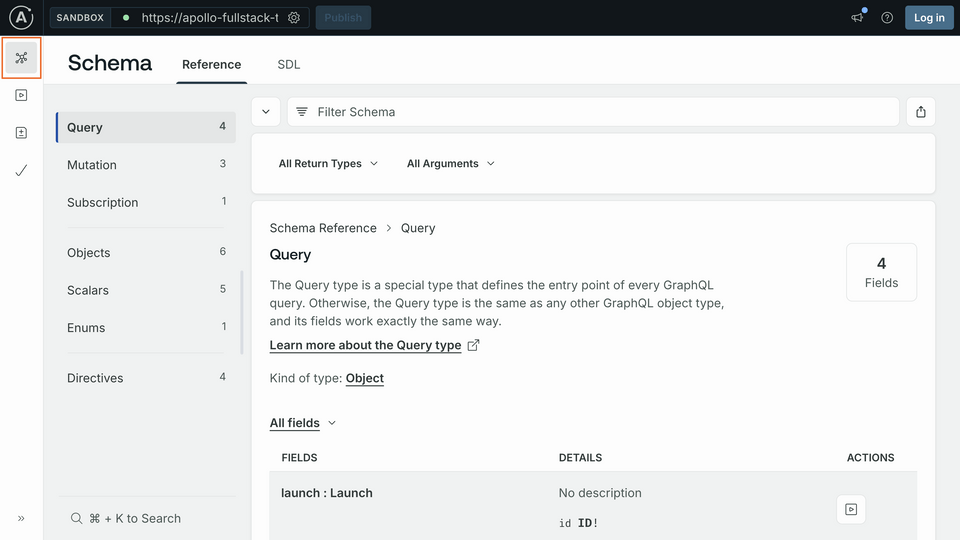
Here we have a full view and reference into our schema! This tells us all about what types and fields exist in the API. These represent the different data objects we can query the API for. And building those queries starts with the Query type.
The query
The most common GraphQL operation is the query, which requests data from your graph in a structure that conforms to the server's schema. In our schema, the Query type defines the various fields we can use to query for different objects.
Scroll down to find the launches field.
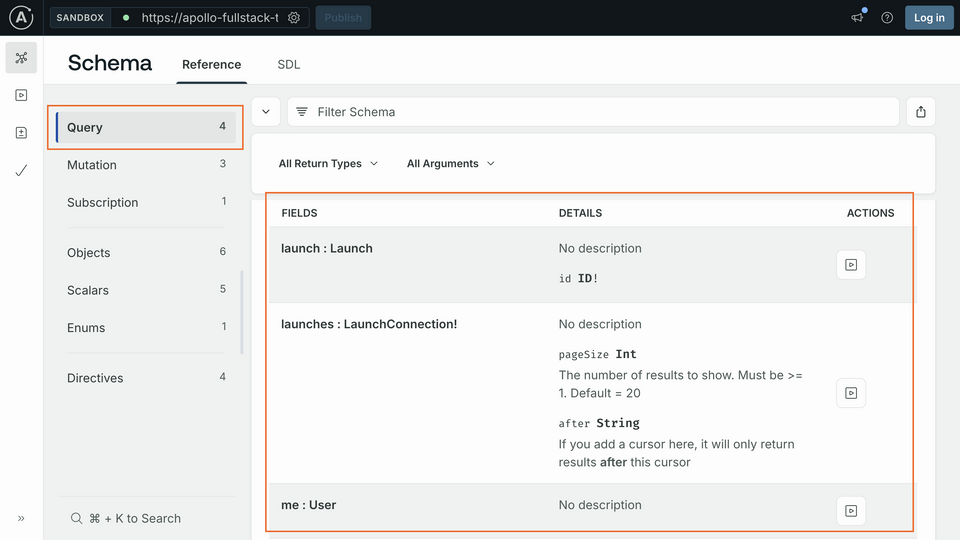
Here we'll find the details about this field. We can see the query term itself, the return type, and information about parameters that can be passed to the query. You can use this information to write a query you'll eventually add to your app.
To start working with this query in Explorer, select the "play" to the right of the field's details.
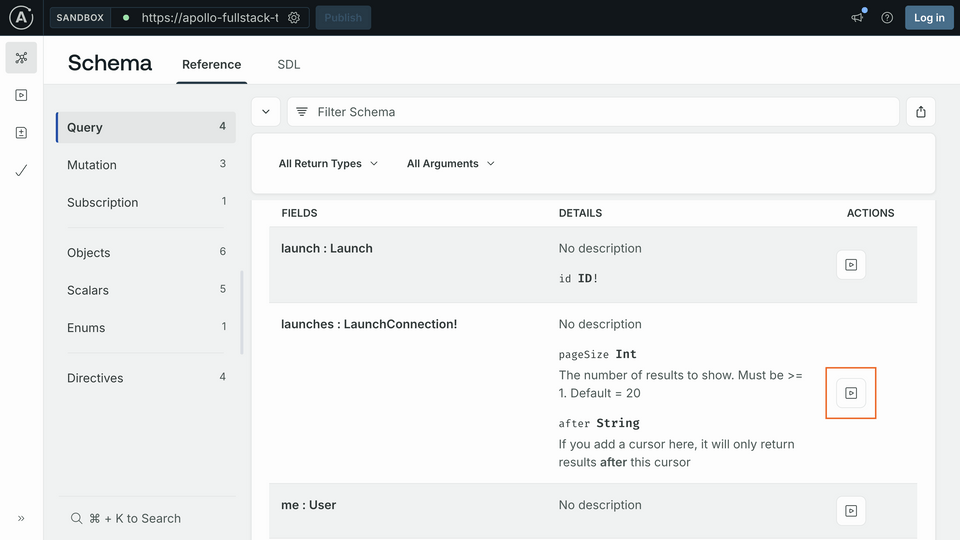
This brings you back to the Explorer tab, with the Documentation panel on the left opened to the field you've selected.
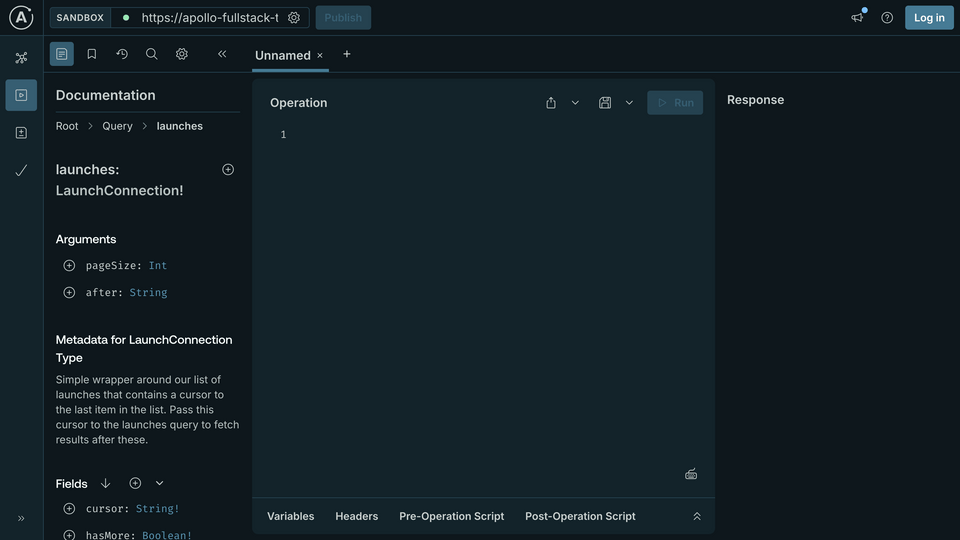
The Operation panel in the middle is where we create queries. We can write the operation manually or add fields from the Documentation panel on the left.
Clicking on the plus (⊕) button next to a field automatically adds that field to our current operation. This is a handy way to assemble complex queries without needing to remember your schema's exact structure or GraphQL syntax.
Let's click the plus button to add the launches field to the Operation panel.
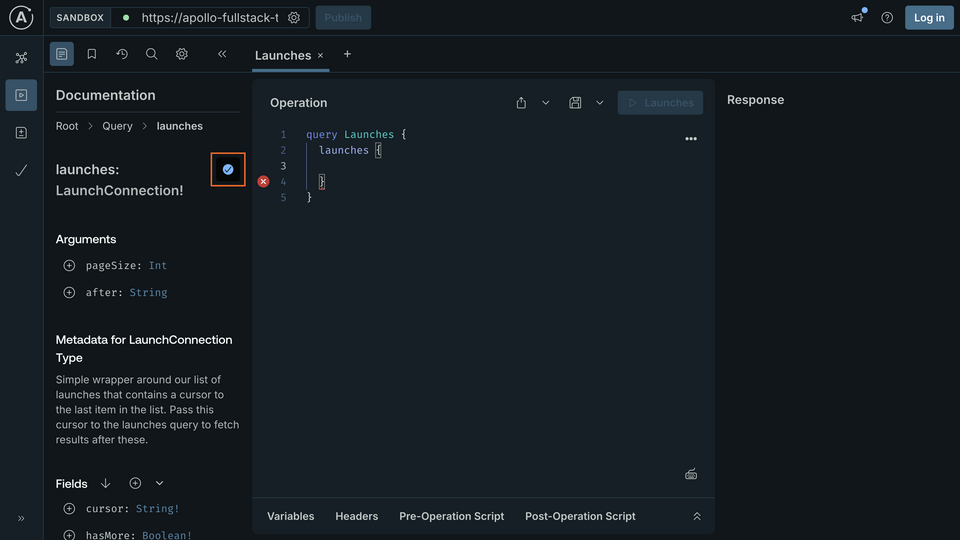
This updates the query in the Operation panel to look like the following:
query Launches {launches {}}
Let's break down what you're seeing here:
- The type of the operation,
query, followed by the name of the operation, currentlyLaunches(we'll make that more specific in a second), is the outermost set of brackets. - The next set of brackets contains the query's selection set. In GraphQL, the term selection set is the list of fields you want to fetch. Since the
argumentsfor this query both have default values, they are not automatically added to the query for you. - An error in the empty space between the brackets, which is where you'll put the list of information you want back from each launch.
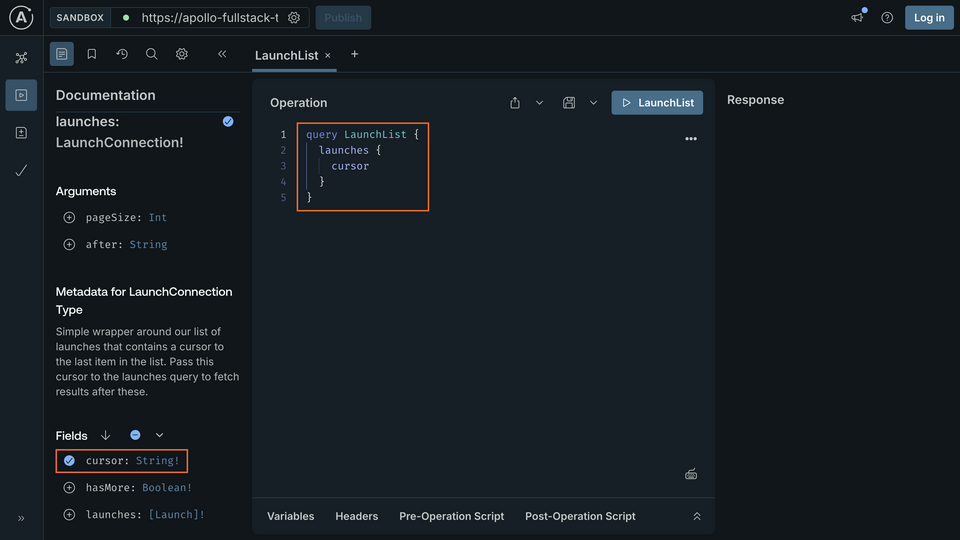
The Apollo iOS SDK requires every query to have a name (even though this isn't required by the GraphQL spec). Since you're going to be creating more than one query, it's also a good idea to give this operation a specific name other than Launches. Change the name of the operation to LaunchList:
Back in the Documentation panel, you can select the fields you want back in the returned object. Start by clicking the button next to the cursor field. It will mark that field as selected, then insert it into your operation.
You can also use auto-complete to add fields to your query. Add a new line below cursor in the Operation panel and start typing ha. An auto-complete box pops up and shows you options based on which fields in the schema match.
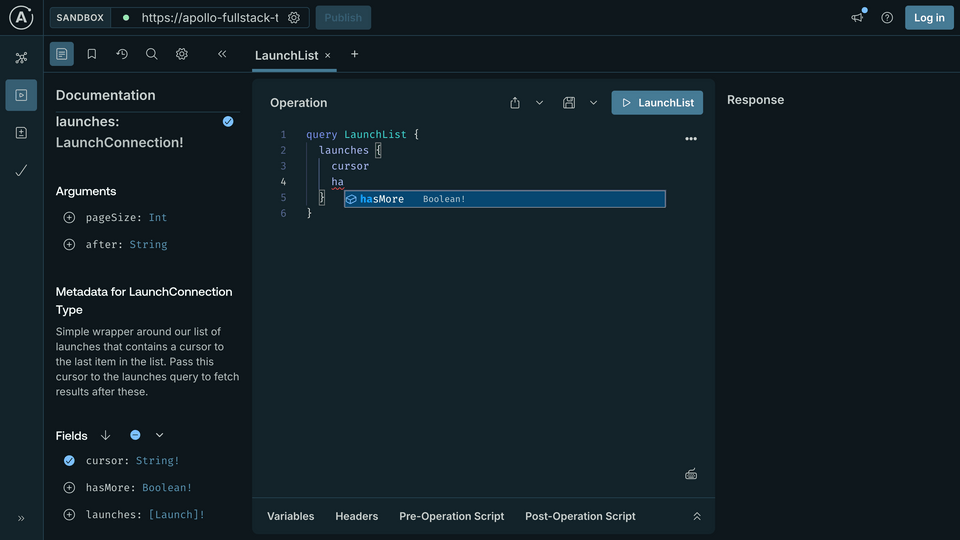
As the schema indicates, the launches query returns a LaunchConnection object. This object includes a list of launches, along with fields related to pagination (cursor and hasMore). The query you've written so far indicates exactly which fields of this LaunchConnection object you want to be returned.
Run this query by pressing the Submit Operation button, which should now have the name of your query, LaunchList. You'll quickly see the query returns results as a JSON object on the right-hand side of the page.
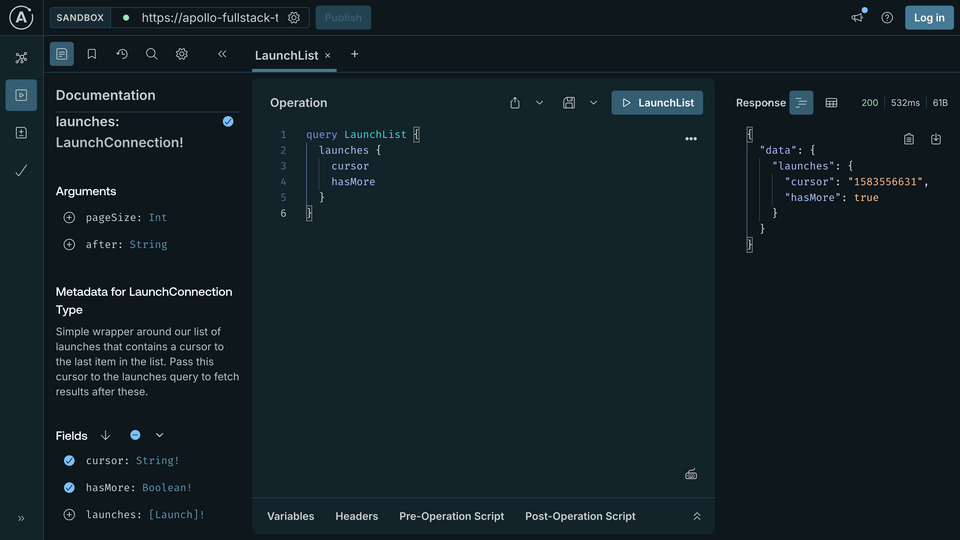
This query executes successfully, but it doesn't include any information about the launches themselves! That's because we didn't include the necessary field in the query. Click the button next to the launches field at the bottom of the left column. It will add a set of braces for launches to the Operation panel, and then update Documentation to show information for the Launch type.
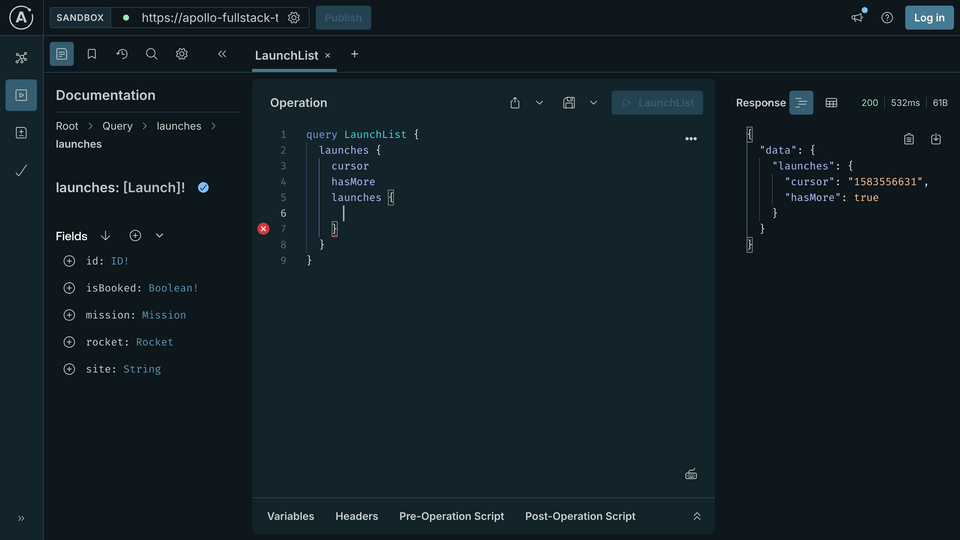
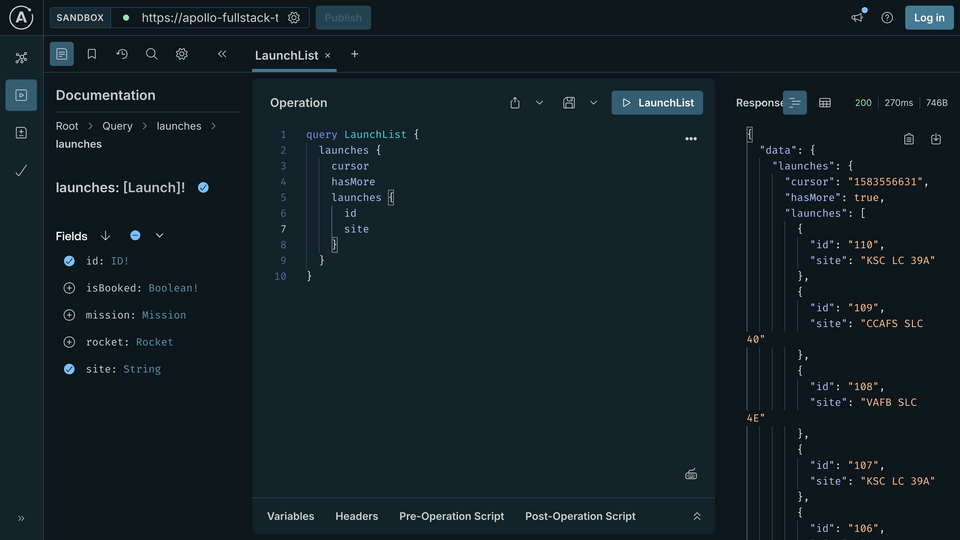
The fields you add in this set of brackets will be fetched for every launch in the list. Click the buttons next to id and site to add those two fields. When you're done, your operation should look like this:
query LaunchList {launches {cursorhasMorelaunches {idsite}}}
Run the operation again. Now you'll see in addition to the information you got back before, you're also getting a list of launches with their ID and site information.
For your convenience, we've created an embeddable version of Apollo Sandbox for this course. Feel free to use this embedded version or a separate browser from here on out.
Up next
Now that we've seen how GraphQL queries work, let's set up the schema in our project.
Share your questions and comments about this lesson
This course is currently in
You'll need a GitHub account to post below. Don't have one? Post in our Odyssey forum instead.