Overview
Let's add more information, including images, to our list of launches. Along the way we'll learn more about GraphQL arguments and enums.
Add mission patches
Go back to LaunchList.graphql. Your query is already fetching most of the information you want to display, but it would be nice to display both the name of the mission and an image of the patch.
Looking at the schema in Apollo Sandbox, you can see that Launch has a property of mission, which allows you to get details of the mission. A mission has both a name and a missionPatch property, and the missionPatch can optionally take a parameter about what size something needs to be.
Because loading a list view with large images can impact performance, ask for the name and a SMALL mission patch. Update your query to look like the following:
query LaunchList {launches {hasMorecursorlaunches {idsitemission {namemissionPatch(size: SMALL)}}}}
Now we'll need to re-run code generation. If you remember the command, great! If you need a refresher, no judgment here, just take a peek below:
When you re-run code generation if you look in LaunchListQuery.graphql.swift, you'll see a new nested type, Mission, with the two properties you requested.
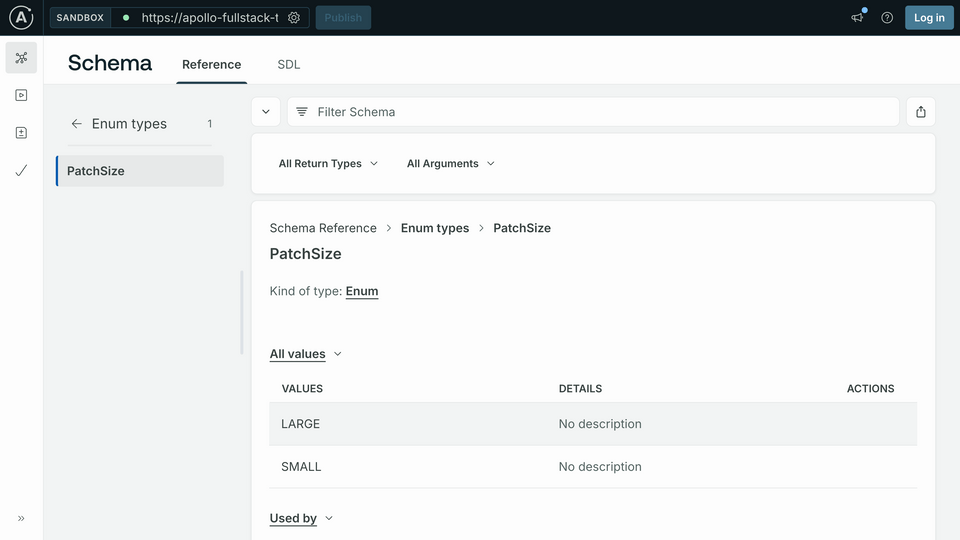
Any GraphQL field can take arguments like missionPatch above, and arguments can be of scalar or complex types. In this case, SMALL is an enum in the GraphQL schema. It can take a finite list of values. If you look at the Schema section in Sandbox, you can see a list of the enums. You can then click in to see that PatchSize can only take two values: SMALL and LARGE

Connect the data to the UI
Go to LaunchRow.swift and add the following import to the top of the file:
import RocketReserverAPIimport SDWebImageSwiftUIimport SwiftUI
Next replace the existing placeholderImg reference with the following code:
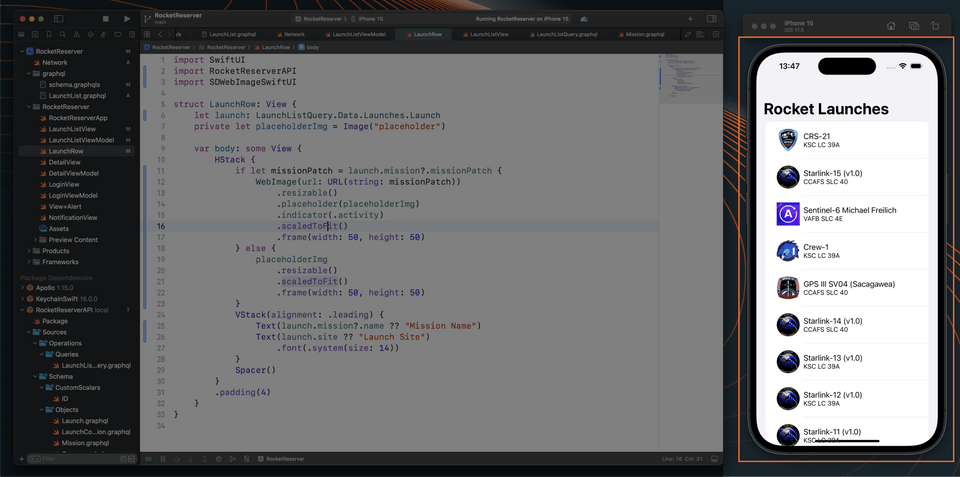
HStack {if let missionPatch = launch.mission?.missionPatch {WebImage(url: URL(string: missionPatch)).resizable().placeholder(placeholderImg).indicator(.activity).scaledToFit().frame(width: 50, height: 50)} else {placeholderImg.resizable().scaledToFit().frame(width: 50, height: 50)}VStack(alignment: .leading) {// ...}}
Finally let's update the text label for the mission name:
VStack(alignment: .leading) {Text(launch.mission?.name ?? "Mission Name")Text(launch.site ?? "Launch Site").font(.system(size: 14))}
Test your query
Build and run the application, and... you'll see all the information for current launches!

If you scroll down, you'll see the list includes only about 20 launches. This is because the list of launches is paginated, and you've only fetched the first page.
Journey's end
And you've done it! We've wired up our frontend to communicate with a GraphQL server, and successfully loaded a list of launches in our UI. Congratuations on completing Part I! In Part II, you'll deepen your understanding of GraphQL and Apollo iOS. Pagination, mutations, and subscriptions are on the launch pad.
When you're ready, we'll see you there: Using Apollo iOS in Swift Applications: Pagination, Mutations, and Subscriptions!
Share your questions and comments about this lesson
This course is currently in
You'll need a GitHub account to post below. Don't have one? Post in our Odyssey forum instead.