Overview
Let's test out our query and validate that it can return data from our remote GraphQL server.
In this lesson we will:
- Create a
Networkclass - Add some temporary code to the
LaunchListViewModelto show how to execute a GraphQL operation
Create an ApolloClient
To use the generated operations in RocketReserverAPI, you first create an instance of ApolloClient. This instance takes your generated code and uses it to make network calls to your server. It's recommended that this instance is a singleton or static instance that's accessible from anywhere in your codebase.
Create a new Swift file within
RocketReservercalledNetwork.swift. Set the target toRocketReserver.Now add the following code into the file:
import Foundationimport Apolloclass Network {static let shared = Network()private(set) lazy var apollo = ApolloClient(url: URL(string: "https://apollo-fullstack-tutorial.herokuapp.com/graphql")!)}
Implement the query
To make sure your ApolloClient instance is communicating correctly with the server, jump into the RocketReserver directory and open up LaunchListViewModel. We'll add the imports shown below, then add the following code to the init() method just below the TODO:
import SwiftUIimport Apolloimport RocketReserverAPI// ...class initializationinit() {// TODO (later in the tutorial)Network.shared.apollo.fetch(query: LaunchListQuery()) { result inswitch result {case .success(let graphQLResult):print("Success! Result: \(graphQLResult)")case .failure(let error):print("Failure! Error: \(error)")}}}
Test your query
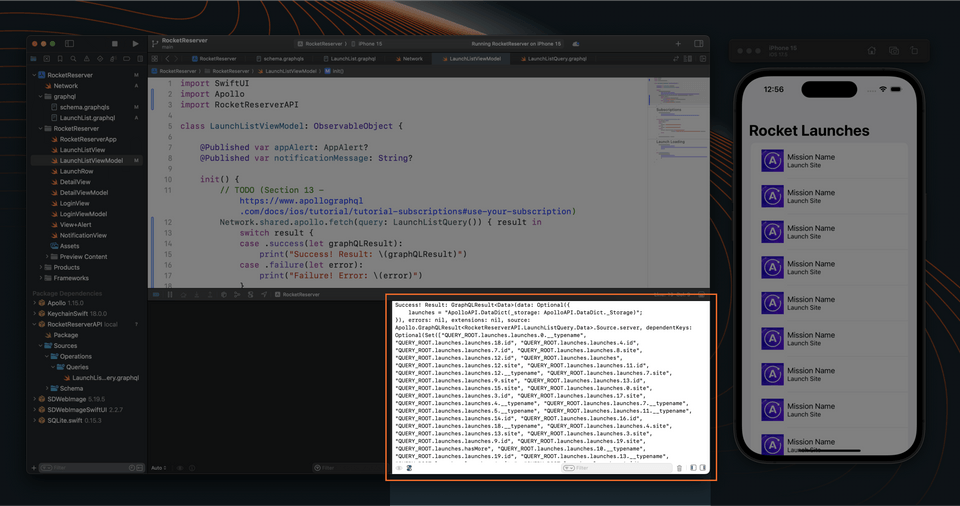
Build and run your application. The web host might take a few seconds to spin up your GraphQL server if nobody's been using it recently, but once it's up, you should see a response in your console that resembles the following:

This means the request was correctly executed and you now have a list of launch sites 🚀🚀🚀
Go ahead and remove the code added to the init() method so there is just the TODO for later:
init() {// TODO (later in the tutorial)}
Up next
Next, let's connect this data to our UI 🚀
Share your questions and comments about this lesson
This course is currently in
You'll need a GitHub account to post below. Don't have one? Post in our Odyssey forum instead.