Overview
Now that we have both a schema and a query file, it's time to run code generation.
In this lesson, we will:
- Run the codegen command
- Add the generated code to our project
- Examine how the code changes when we alter our query
Running code generation
To run code generation run the following command in a terminal opened to your project directory:
./apollo-ios-cli generate
In Finder, you should now see a new RocketReserverAPI folder in your project directory which contains the Swift package with your generated source code.
📦 starter┣ 📂 RocketReserver┣ 📂 RocketReserver.xcodeproj┣ 📂 RocketReserverAPI┣ 📄 apollo-codegen-config.json┣ 📄 apollo-ios-cli┗ 📂 graphql
Add the generated SPM package to your project
With the code generated, next we need to add the generated SPM package to the project.
The default configuration for code generation creates a new Swift package for the schema module and operations. For more information on code generation such as different module types you can generate or different ways to run code generation see the documentation.
In Xcode go to File > Add Package Dependencies..., in the dialog select Add Local...
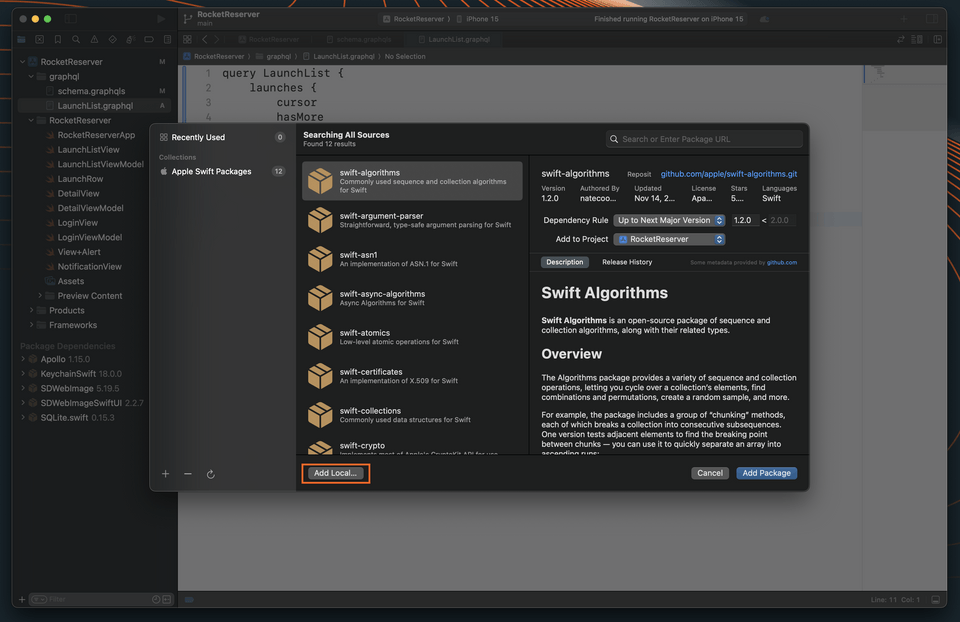
Select the
RocketReserverAPIfolder in the file dialog, then click Add Package.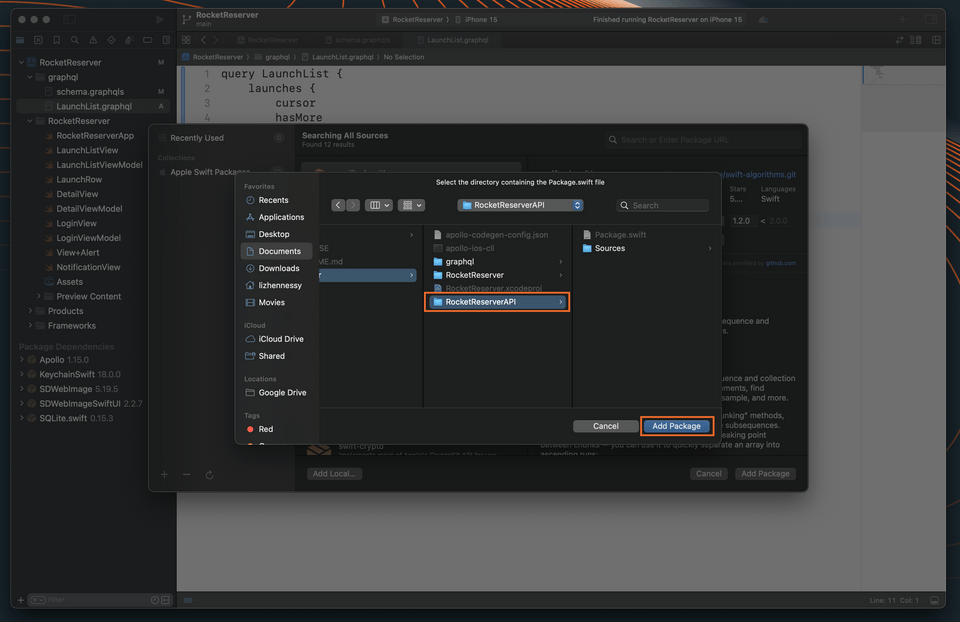
Add it to the app target.
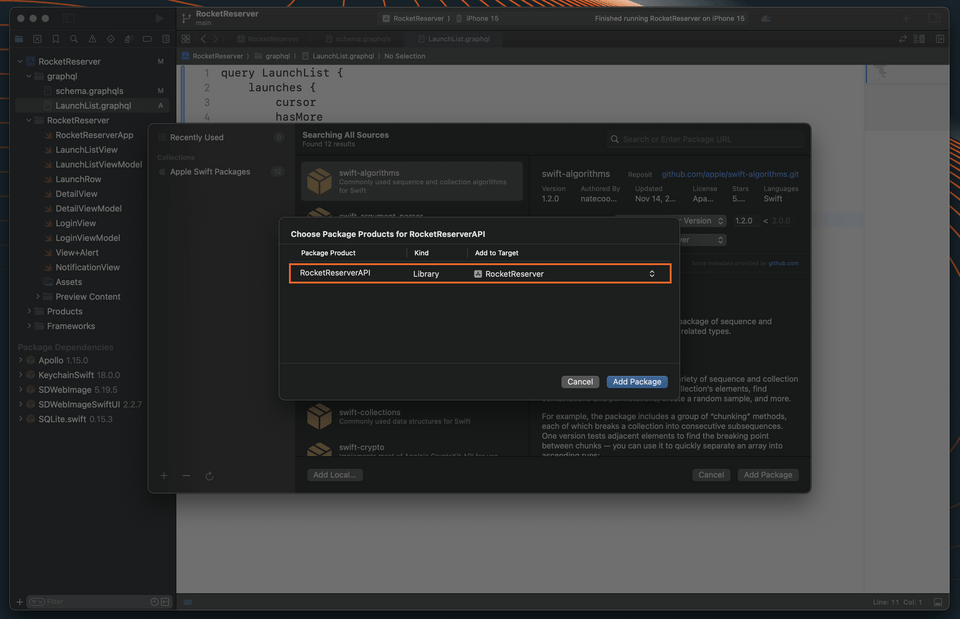
You should now see the
RocketReserverAPIpackage included in your project.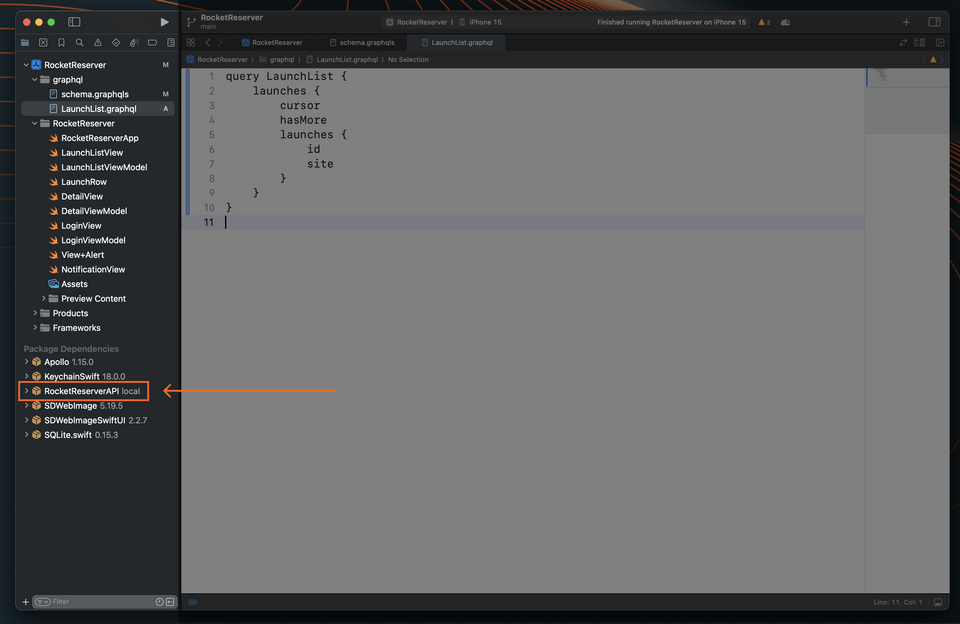
Great! Let's take a look at what we added.
Examine the generated code
In the Xcode project hierarchy, find RocketReserverAPI under Dependencies. Drill down to /Sources/Operations/Queries/LaunchListQuery.graphql.swift.
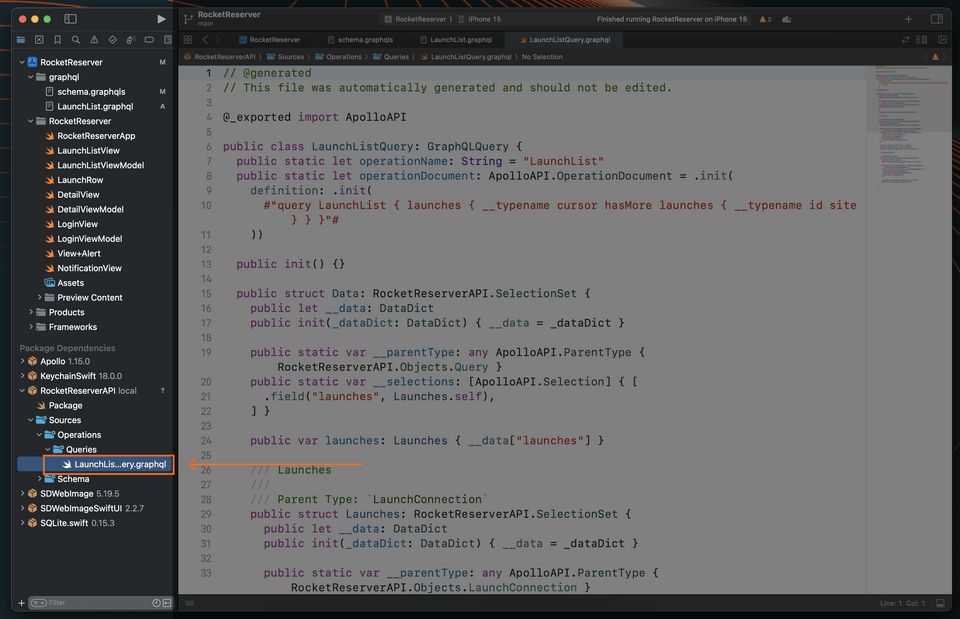
That generated file defines a root class, LaunchListQuery, with many nested structs below it. If you compare the structs to the JSON data returned in Apollo Sandbox, you see that the structure matches. These structs include properties only for the fields that your query requests.
# ... other structspublic struct Launch: RocketReserverAPI.SelectionSet {public let __data: DataDictpublic init(_dataDict: DataDict) { __data = _dataDict }public static var __parentType: any ApolloAPI.ParentType { RocketReserverAPI.Objects.Launch }public static var __selections: [ApolloAPI.Selection] { [.field("__typename", String.self),.field("id", RocketReserverAPI.ID.self),.field("site", String?.self),] }public var id: RocketReserverAPI.ID { __data["id"] }public var site: String? { __data["site"] }}
Let's see how this generated file changes when we alter our LaunchList query. Jump back into LaunchList.graphql, in our project's main graphql file. Let's comment out the id field, using a #.
query LaunchList {launches {cursorhasMorelaunches {# idsite}}}
Save the file, then open up your terminal. Let's rerun the codegen command.
./apollo-ios-cli generate
Now let's check out the results in LaunchListQuery.graphql, deep in the RocketReserverAPI dependency.
# ... other structspublic struct Launch: RocketReserverAPI.SelectionSet {public let __data: DataDictpublic init(_dataDict: DataDict) { __data = _dataDict }public static var __parentType: any ApolloAPI.ParentType { RocketReserverAPI.Objects.Launch }public static var __selections: [ApolloAPI.Selection] { [.field("__typename", String.self),.field("site", String?.self),] }public var site: String? { __data["site"] }}
The innermost Launch now only includes the built-in __typename and the requested site property—the id field, because we commented it out, is nowhere to be found! This gives us a really good idea of how the codegen process outputs exactly the code we'll need to make our operations functional—nothing more, and nothing less.
We actually do want to keep the id field, so let's uncomment it in LaunchList.graphql and re-run code generation to restore the property.
Up next
Now that you've generated code and had a chance to see what's in there, it's time to get everything working end to end! Next, we'll execute the query.
Share your questions and comments about this lesson
This course is currently in
You'll need a GitHub account to post below. Don't have one? Post in our Odyssey forum instead.