Overview
Rover's giving us some build errors: we've got fields in our schema that are missing instructions—and that's a job for the @connect directive.
In this lesson, we will:
- Learn about the
@connectdirective syntax - Use
@connectto retrieve data for aQueryfield
A closer look at @connect
The @connect directive describes how to get the data for a GraphQL field from a REST endpoint.
@connect takes in four parameters:
source: a unique identifier for the data source. This should be the same as thenamevalue we defined in the@sourcedirective.http: an object that defines the HTTP request to make, including HTTP method and path.selection: where we map the API's JSON response to GraphQL fieldsentity: If we set this to true, this connector can provide instructions on how to retrieve the data for the entity's fields. We'll learn more about entities in a later lesson.
When we extend our schema with the connectors spec, each root field requires a @connect directive. By root field, we mean the fields on the Query and Mutation types, which are the entry points to a GraphQL API.
Let's see @connect in action.
Importing the @connect directive
To start, we'll need to let our schema know about the directive.
At the top of the
listings.graphqlschema, where we imported the source directive from the connectors spec, let's add@connect.listings.graphql@link(url: "https://specs.apollo.dev/connect/v0.1"import: ["@source", "@connect"])
@connect and featured listings
Now we're ready to use it!
Let's find the
featuredListingsfield under theQuerytype. Rover was complaining about this field in particular not having a@connectdirective, so let's add it.listings.graphqltype Query {"A curated array of listings to feature on the homepage"featuredListings: [Listing!]!}We'll take advantage of the auto-complete the Apollo VS Code extension gives us. Type
@connectand hit Enter and we'll get all the directive parameters ready to be filled in.listings.graphqlfeaturedListings: [Listing!]!@connect(source: ""http: { GET: "" }selection: """""")First, the
source. Let's set the value to the same one we defined at the top.listings.graphqlsource: "listings"Next up is the
httpparameter, where we'll need to indicate what endpoint we're sending the request to. Let's take a moment to review our mockup and the REST API endpoint we'll need.
GET /featured-listings
Airlock's homepage needs to display a grid of featured listings along with a few properties.
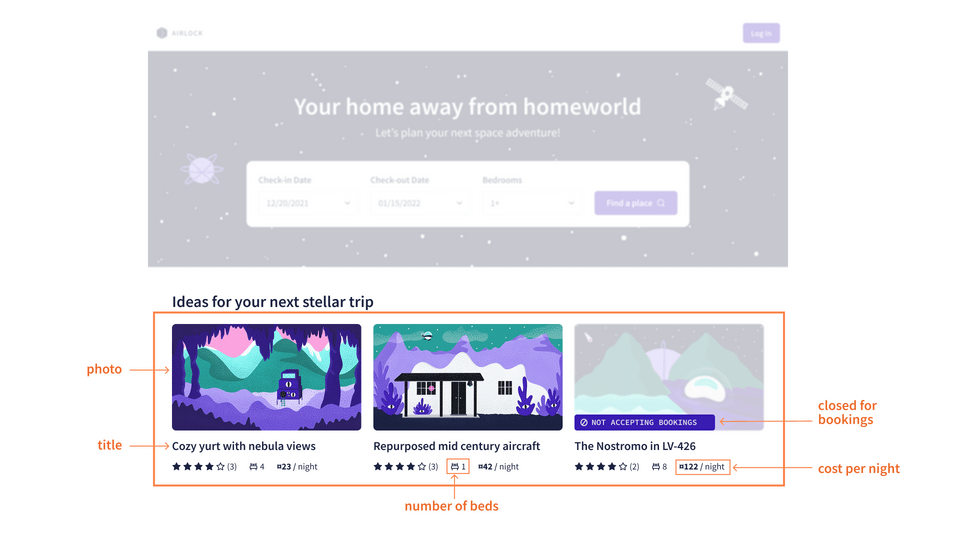
In this lesson, we're starting small and tackling the id and title fields first.
Mapping this back to our REST API, we'll need to retrieve this data from the GET /featured-listings endpoint. We can examine the response from that endpoint here: https://airlock-listings.demo-api.apollo.dev/featured-listings. We see an array of listing objects with a bunch of different properties.
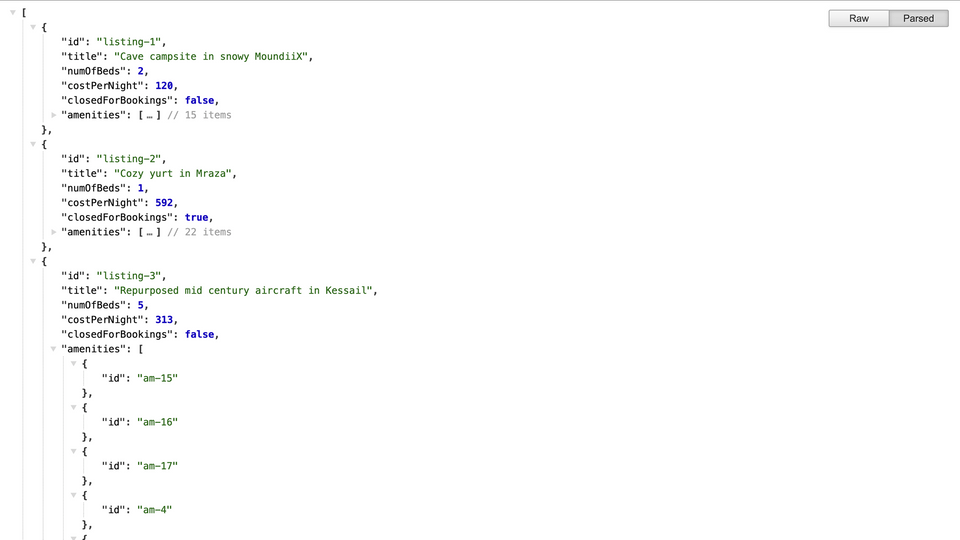
Now how do we take this data and connect it to our GraphQL schema?
The http request
The http parameter is already set to a GET request, so all we need to do is add the /featured-listings endpoint.
http: { GET: "/featured-listings" }
Finally, we just have selection left!
The selection mapping
Remember, selection defines the mapping from the JSON response to our schema fields.
In our schema, the featuredListings field returns an array of Listing types. Each Listing type requires an id and title.
As we can see in our REST API response, those two properties are already returned for each item in the array. These are exactly the properties we need, named exactly how we want them! A simple one-to-one mapping.
[{"id": "listing-1","title": "Cave campsite in snowy MoundiiX","numOfBeds": 2,"costPerNight": 120,"closedForBookings": false,"amenities": [{"id": "am-2"},{"id": "am-10"},{"id": "am-11"}// more amenities]}// more featured listings]
Let's add them to the selection, inside these triple quotes.
selection: """idtitle"""
Checking our work
All right, let's save our changes. We should see those pesky errors go away; Rover says the schema is good to go and the router is all set at http://localhost:4000.
We're going to use the Sandbox Explorer as our client here, kind of acting as a stand-in for whatever is going to send requests to our API. This could be something like a web page, a mobile app, or even a chatbot.
Using the sidebar, we'll build our request, also known as a GraphQL operation.
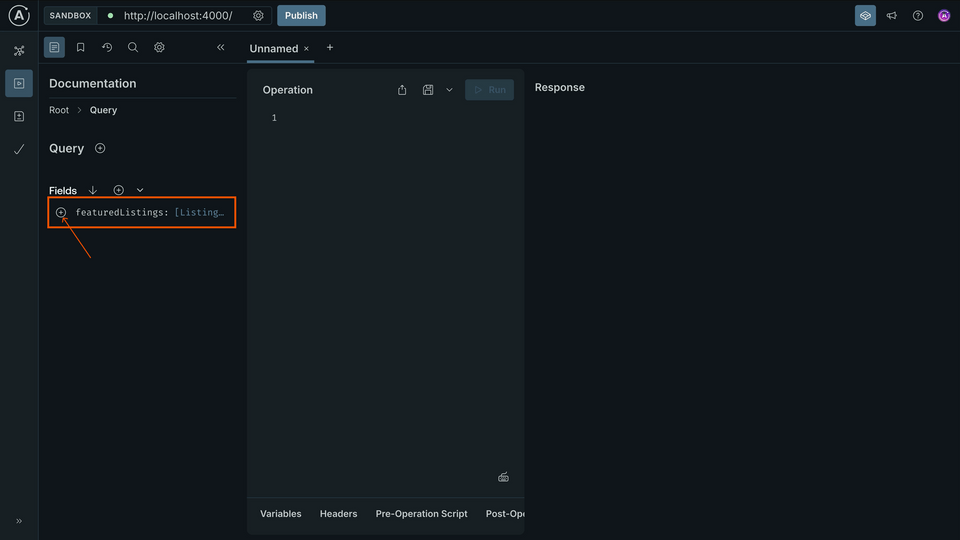
We'll ask for our featuredListings by clicking on the plus icon, along with the pieces of data we'll need to satisfy our mockup: the id and title.
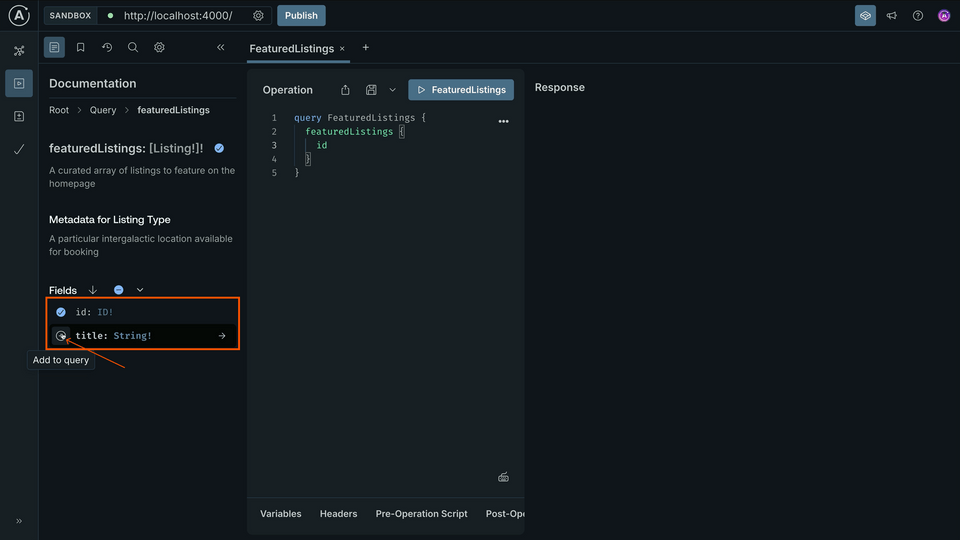
While we're here, we can rename this operation to GetFeaturedListings. Your operation should look like this:
query GetFeaturedListings {featuredListings {idtitle}}
Let's run this thing! And we get data back; look at these fun space locations we can visit!
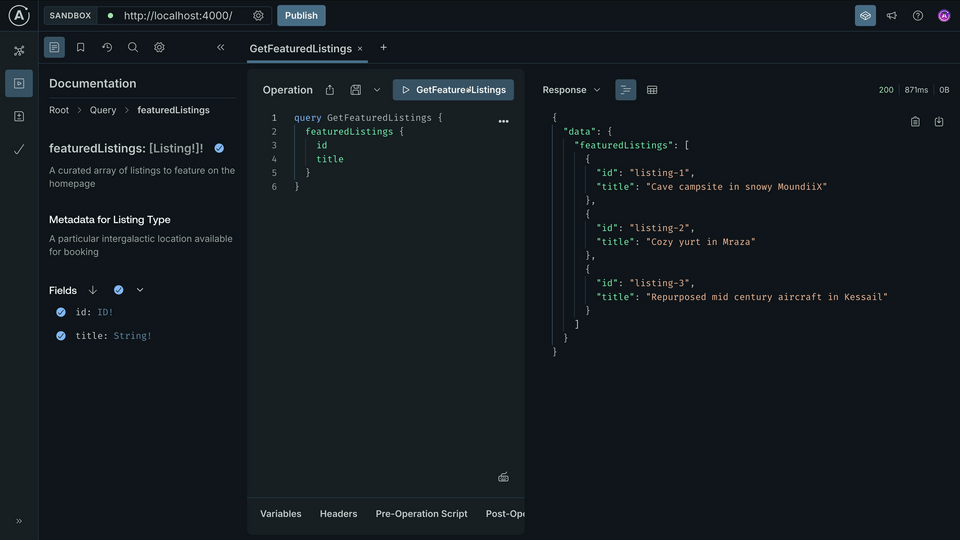
{"data": {"featuredListings": [{"id": "listing-1","title": "Cave campsite in snowy MoundiiX"},{"id": "listing-2","title": "Cozy yurt in Mraza"},{"id": "listing-3","title": "Repurposed mid century aircraft in Kessail"}]}}
We've set the foundations. With one request from the client in the form of a GraphQL query, the router takes care of retrieving and returning just that data from an underlying REST API, all through the connector we built! As we grow our schema, we'll see just how powerful connectors can be.
Practice
@connect directive parameters should you use to map the endpoint's specific JSON properties to your GraphQL schema?Use the REST API JSON response below to complete the code challenge.
{"id": "px-m012","name": "Mraza","mass": 6.42}
Add the @connect directive to the Query.popularPlanets field. Use the outerspace source and the API endpoint GET /planets?sort=popular. Refer to the JSON object above and the existing schema to define the selection.
Key takeaways
- The
@connectdirective describes how to get the data for a particular GraphQL field using a definedsource. - Each root field (the fields on the
QueryandMutationtypes) requires a@connectdirective. - We use
@connect'shttpparameter to define the HTTP method and URL parameters on thesourcethat should be used to retrieve data for a field. - We use
@connect'sselectionparameter to map the REST API's JSON response to our GraphQL fields.
Up next
We started small with just a couple of fields, but there's more to show! Let's add more fields and see what happens when our mapping doesn't quite match one-to-one.
Share your questions and comments about this lesson
Your feedback helps us improve! If you're stuck or confused, let us know and we'll help you out. All comments are public and must follow the Apollo Code of Conduct. Note that comments that have been resolved or addressed may be removed.
You'll need a GitHub account to post below. Don't have one? Post in our Odyssey forum instead.