Overview
There's more to APIs than just reading data. We need to be able to do things with our data as well, which is where GraphQL mutations come in. Let's tackle one last feature: creating a listing.
In this lesson, we will:
- Set up a connector with a
POSTrequest that accepts a body - Learn about how to craft a
selectionwith nested properties
Create a listing
On the REST API side, we'll use the POST /listings endpoint. Here's what the curl request looks like.
curl --location 'https://airlock-listings.demo-api.apollo.dev/listings' \--header 'Content-Type: application/json' \--header 'Api-Key: ODYSSEY' \--data '{"listing": {"title": "GraphQL Summit Home Base","numOfBeds": 4,"costPerNight": 404}}'
To send the request, you'll need to provide a value for the Api-Key header. (Here we've included the example ODYSSEY, which you're welcome to use—but any value will work!)
And here's the shape of the data we receive back:
{"id": "06611dcd-f21f-4676-a02c-ad4b205c6d64","title": "GraphQL Summit Home Base","description": "","costPerNight": 404,"numOfBeds": 4,"hostId": "user-4","locationType": "CAMPSITE","photoThumbnail": "https://res.cloudinary.com/apollographql/image/upload/v1644353890/odyssey/federation-course2/illustrations/listings-10.png","isFeatured": false,"closedForBookings": false,"latitude": null,"longitude": null,"amenities": []}
We'll need to map this response to our schema, and learn how to send a POST request with a body payload using connectors.
Setting up the schema
First, let's add the types and fields we need in the schema to make this feature come to life.
listings.graphqlinput CreateListingInput {title: String!numOfBeds: Int!costPerNight: Float!}type CreateListingResponse {listing: Listing}type Mutation {createListing(input: CreateListingInput!): CreateListingResponse}We've added a new root field under the
Mutationtype, where we organize fields that handle write operations.createListingtakes in aninputargument:CreateListingInput. This type consists of three required fields:title,numOfBedsandcostPerNight. Finally, the mutation returns aCreateListingResponsetype; this has one field calledlisting, which returns theListingtype.Note: If you need a refresher on mutations and input types in the GraphQL schema, check out graphql.com/learn.
If we save our changes now, we'll see that familiar error.
rover dev errorerror[E029]: Encountered 1 build error while trying to build a supergraph.Caused by:MUTATION_FIELD_MISSING_CONNECT: [listings] The field `Mutation.createListing` has no `@connect` directive.
Adding a connector
Every root field needs a connector, so let's get to it.
Let's append the
@connectdirective to thecreateListingfield, defining thesourceas usual.listings.graphqlcreateListing(input: CreateListingInput!): CreateListingResponse@connect(source: "listings"http: { GET: "" }selection: """""")Next up, for
http, we'll need to change theGETcall to aPOSTcall and point to the/listingsendpoint.listings.graphqlhttp: {POST: "/listings"}As we saw in the curl command, we need to include a header called
Api-Key. We can add that to ourhttpobject under the propertyheaders, which contains an array.listings.graphqlhttp: {POST: "/listings",headers: []}For each header object, we can specify the
nameproperty, which in this case isApi-Key.listings.graphqlhttp: {POST: "/listings",headers: [{name: "Api-Key"}]}We also need to specify the header value. We could hard-code the value we're using here (under the
valueproperty).listings.graphqlhttp: {POST: "/listings",headers: [{name: "Api-Key",value: "ODYSSEY" # ⬅️ We could hard-code the value here}]}Or we can propagate user input. Using the
fromproperty, we'll set the value to the name of the header we're propagating from (which will also be calledApi-Key!). We'll see how this works in action later on.listings.graphqlhttp: {POST: "/listings",headers: [{name: "Api-Key",from: "Api-Key" # ⬅️ Let's propagate it from user input instead!}]}
This call still needs a body! This will be a mapping similar to selection, but going the other way around: mapping schema to JSON.
Crafting the body mapping
Let's look at the shape of that body payload from our curl request again (the --data value). This is the end result we want:
{"listing": {"title": "GraphQL Summit Home Base","numOfBeds": 4,"costPerNight": 404}}
We've got listing set to an object with three properties: title, numOfBeds and costPerNight.
Let's reflect that back in our connector. Still within the
httpobject, we'll add abodyparameter and triple quotes.listings.graphqlhttp: {POST: "/listings"headers: [{ name: "Api-Key", from: "Api-Key" }]body: """"""}Inside, we'll define the name of the top-level property, which is
listing, followed by a colon, with the value set to an object.listings.graphqlbody: """listing: {}"""Then we'll start adding those three properties we need.
listings.graphqlbody: """listing: {title:numOfBeds:costPerNight:}"""Each of these will need a value, and it should come from the
inputargument that gets passed in from the client. Remember, we can access arguments with$args. So for thetitle, we'll need$args.input.title. We'll also follow the same pattern fornumOfBedsandcostPerNight.listings.graphqlbody: """listing: {title: $args.input.titlenumOfBeds: $args.input.numOfBedscostPerNight: $args.input.costPerNight}"""
And we're all done with the body of the POST request!
Crafting the selection mapping
If we save our changes now, we'll get an error.
error[E029]: Encountered 1 build error while trying to build a supergraph.Caused by:INVALID_SELECTION: [listings] `@connect(selection:)` on `Mutation.createListing` is empty
We need a selection mapping to finish off this connector!
createListing(input: CreateListingInput!): CreateListingResponse@connect(source: "listings"http: {POST: "/listings"headers: [{ name: "Api-Key", from: "Api-Key" }]body: """listing: {title: $args.input.titlenumOfBeds: $args.input.numOfBedscostPerNight: $args.input.costPerNight}"""}selection: """""")
This mutation needs to return a
CreateListingResponsetype, which contains alistingfield that returns aListingtype. First, we'll define that top-levellistingproperty, followed by a colon, with the value set to an object.listings.graphqlselection: """listing: {}"""Let's pull up that response object again to help us out. It looks like the response has all the properties we need to map to our schema's
Listingfields, pretty much one-to-one. (Even if some of them arenullor empty!)Response from curl request{"id": "06611dcd-f21f-4676-a02c-ad4b205c6d64","title": "GraphQL Summit Home Base","description": "","costPerNight": 404,"numOfBeds": 4,"hostId": "user-4","locationType": "CAMPSITE","photoThumbnail": "https://res.cloudinary.com/apollographql/image/upload/v1644353890/odyssey/federation-course2/illustrations/listings-10.png","isFeatured": false,"closedForBookings": false,"latitude": null,"longitude": null,"amenities": []}Let's add all of those fields. Make sure you rename
closedForBookingstoclosedForBookingto match our schema!listings.graphqlselection: """listing: {idtitlenumOfBedscostPerNightclosedForBooking: closedForBookingsdescriptionphotoThumbnaillatitudelongitudeamenities {idnamecategory}}"""
Checking our work
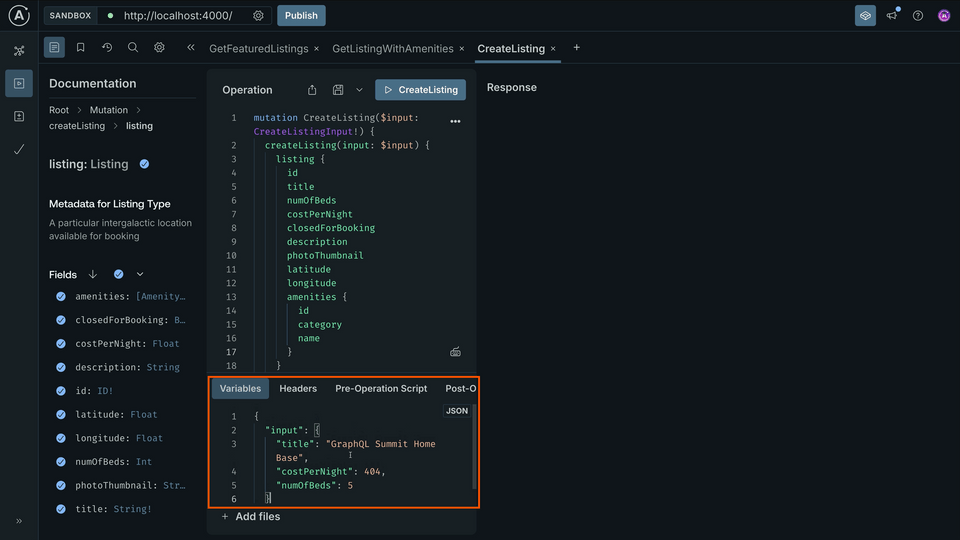
Moment of truth! Let's check out Sandbox and start to build out this mutation, adding the fields we need from the sidebar.
mutation CreateListing($input: CreateListingInput!) {createListing(input: $input) {listing {idtitlenumOfBedscostPerNightclosedForBookingdescriptionphotoThumbnaillatitudelongitudeamenities {idcategoryname}}}}
We'll need to provide the input in the Variables section with the details of the listing we're creating.
{"input": {"title": "GraphQL Summit Home Base","costPerNight": 404,"numOfBeds": 5}}

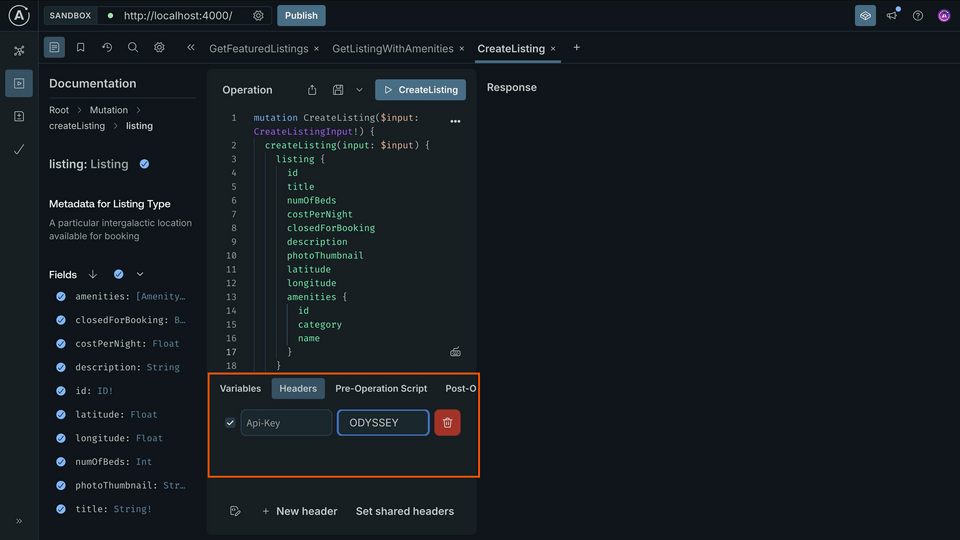
Adding headers
Under the Headers section, let's add a new header, called Api-Key, passing in a value.

Remember, we built our connector to take the value from this header and propagate it to our REST API call.
Go ahead and run it! And we get data back with the details of our new listing, complete with an id generated from the REST API.
{"data": {"createListing": {"listing": {"id": "d6c46fed-98bc-4ca6-b74f-93f9949c1db3", // you will get a different ID!"title": "GraphQL Summit Home Base","numOfBeds": 5,"costPerNight": 404,"closedForBooking": false,"description": "","photoThumbnail": "https://res.cloudinary.com/apollographql/image/upload/v1644353890/odyssey/federation-course2/illustrations/listings-10.png","latitude": null,"longitude": null,"amenities": []}}}}
Practice
POST requests are usually accompanied by a payload. How do we send that payload to the REST API endpoint using a connector?Use the REST API body payload below to complete the code challenge.
{"officialName": "Mraza","mass": 6.42}
Fill in the missing values for the createPlanet field's @connect directive. Use the POST /planets endpoint, which needs an Authorization header propagated from a user-provided header of the same name. Refer to the JSON object above for the shape of the body payload, and the input argument for the values needed.
Key takeaways
- We can apply connectors to
Mutationtype fields just as we do forQuerytype fields. - When submitting data to a
POSTendpoint, we can include abodyin our connector'shttpdefinition.
Conclusion
Well done! You've successfully built an API powered by Apollo Connectors. You now have the tools and patterns to keep on exploring and building.
Let us know about what you're creating, and what you'd like to see next. Drop us a note in the community forum.
Want to keep learning? Dive deeper into the selection mapping syntax with Expressions in connectors: Mapping and Transforms.
See you next time!
Share your questions and comments about this lesson
Your feedback helps us improve! If you're stuck or confused, let us know and we'll help you out. All comments are public and must follow the Apollo Code of Conduct. Note that comments that have been resolved or addressed may be removed.
You'll need a GitHub account to post below. Don't have one? Post in our Odyssey forum instead.